
This quilt can be made as big or as small as you would like. You can make it with flannel (highly suggested as then you can omit the cost and steps of cutting the batting) or with cotton fabrics. There are a million different designs you can do with this as well. You can make a stained glass look by doing a dark fabric on one side and brighter fabrics on the front, or you can make a scrap quilt (my favorite) by using all different colors and kinds of scraps. These turn out the best in my opinion and have been some of my favorites to see others complete. For mine, I used two coordinating fabric colors. JoAnn's has a lot of fun fabric lines that have coordinating fabric colors and options. If I did this quilt again I would probably just pick two fabrics and go that route instead of making myself crazy that two of the same fabrics may have been touching and getting a bit too friendly.
Let's talk numbers for a bit shall we? I like to go big on my quilts or go home. When you have 5 people in your family, three of which are small children who like to snuggle and get close, I have no other choice but to share my blanket. My quilt came out a bit smaller than I would have liked. It is more the size of a lap quilt than a queen size, but I will give you my calculations for making a HUGE quilt. (You will have to calculate how many circles you will need if you change the size. Bwahahahahaha!)
For a 84" x 84" quilt (This will be 12 circles by 12 circles if we are talking circle) you will need 288 cloth circles. If you want a quilt like mine, using 2 coordinating fabrics, that is 144 cloth circles of each color, so once all sewn up will become 72 circle bubbles of each color before sewing together. Make sense?
How much fabric do you need for said cloth circles? 20 yards. Yup. Ouch. (BUT! Oh so worth it) If you are going the route I did, I had a thin piece of batting between each of my cloth circles...for that you will need to cut 144 batting circles.
Math is hard, I know. I know.
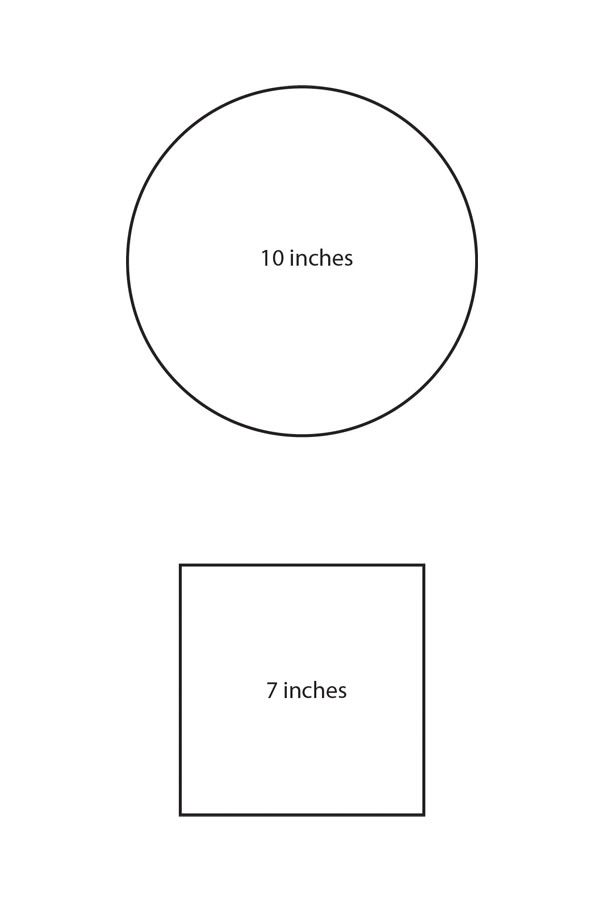
Here we have the circle size below. You will need to cut a 10" circle template either out of heavy plastic or cardboard. Then another 7" square out of heavy plastic or cardboard. You will be using these A LOT.
Next, the part I didn't photograph because I never thought anyone would ask me how I did this blasted quilt...
Trace the circles on wrong side of fabric leaving 1/4" seam allowance around each circle when cutting them out. All 432 of them (fabric + batting). You will need to make sure to leave enough allowance between each tracing (that is 1/2") or else your circles will end up the wrong size when it comes to sewing them together and that will be messy. In essence your circles will be about 10.5" when you cut them out. Mine were not pretty, just sayin'. So when the tracing is done, then what? CUT, CUT, CUT, CUT, CUT, CUT, CUT, oh? Don't forget to CUT. Did I mention all the cutting?
Now the tricky part. Making the circle sandwiches and beginning to sew.
Place one of each color of fabric (just going off of my two color design) right sides together. Place a piece of batting on bottom of stack. Then alternate.
The sandwich will be as follows: light fabric right side facing dark fabric right side, then batting.
Next sandwich: dark fabric right side facing light fabric right side, then batting.
Continue for all the circle sandwiches.
Sew around each circle. You will be able to see the circle lines you traced. Just sew on that line as your guide.
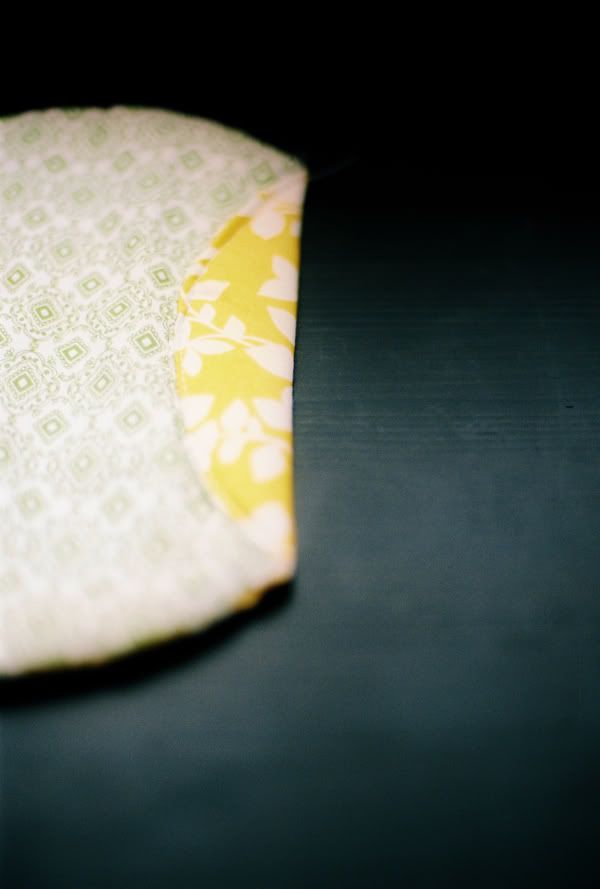
See how ugly mine were cut out? I know, horrid right? This is a photo of one of the circle sandwiches sewn. (Batting side is up. Don't you love that adorable helping hand?)
Trace the circles on wrong side of fabric leaving 1/4" seam allowance around each circle when cutting them out. All 432 of them (fabric + batting). You will need to make sure to leave enough allowance between each tracing (that is 1/2") or else your circles will end up the wrong size when it comes to sewing them together and that will be messy. In essence your circles will be about 10.5" when you cut them out. Mine were not pretty, just sayin'. So when the tracing is done, then what? CUT, CUT, CUT, CUT, CUT, CUT, CUT, oh? Don't forget to CUT. Did I mention all the cutting?
Now the tricky part. Making the circle sandwiches and beginning to sew.
Place one of each color of fabric (just going off of my two color design) right sides together. Place a piece of batting on bottom of stack. Then alternate.
The sandwich will be as follows: light fabric right side facing dark fabric right side, then batting.
Next sandwich: dark fabric right side facing light fabric right side, then batting.
Continue for all the circle sandwiches.
Sew around each circle. You will be able to see the circle lines you traced. Just sew on that line as your guide.
See how ugly mine were cut out? I know, horrid right? This is a photo of one of the circle sandwiches sewn. (Batting side is up. Don't you love that adorable helping hand?)

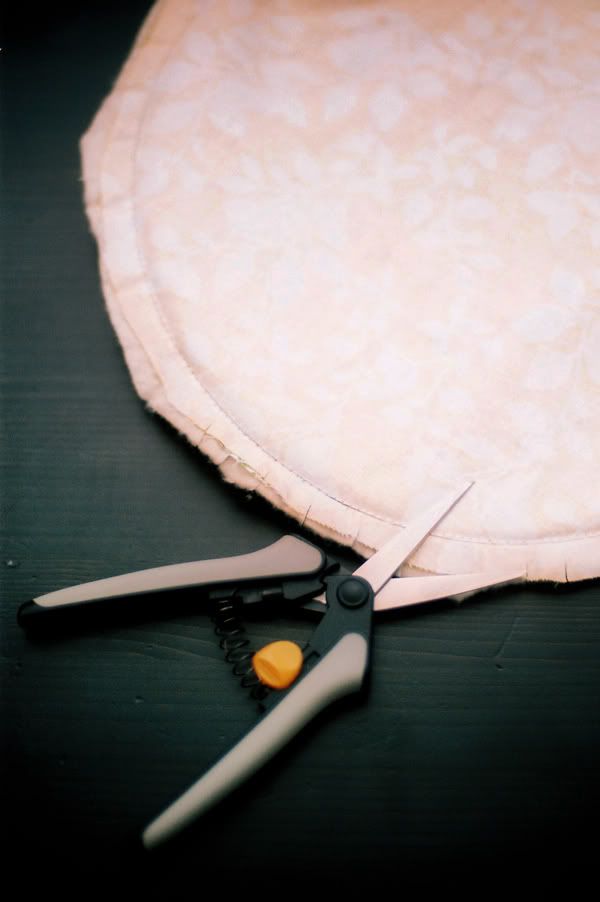
Next, THE best investment I ever made back when rag quilts were all the rage, were these SUPER sharp self opening shears. They nip, nip, nip fast. Nip into the seam allowance as shown to reduce bulk when turning.
Next, close to the edge, cut a strip into the top fabric. Cut large enough so that the fabric can be turned inside out easily, but not so large or so open in the middle that it can't be covered by the next steps in the process. (Don't worry I will show you!)
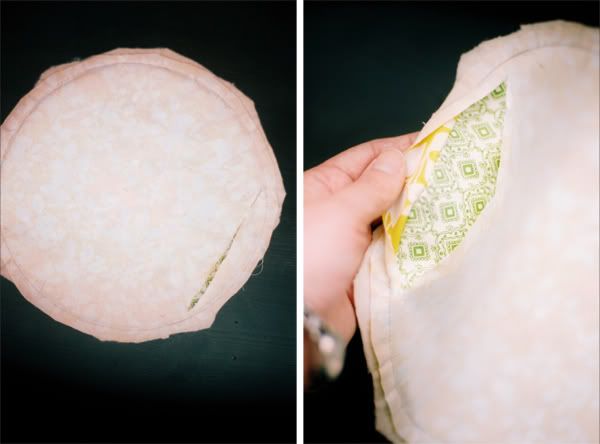
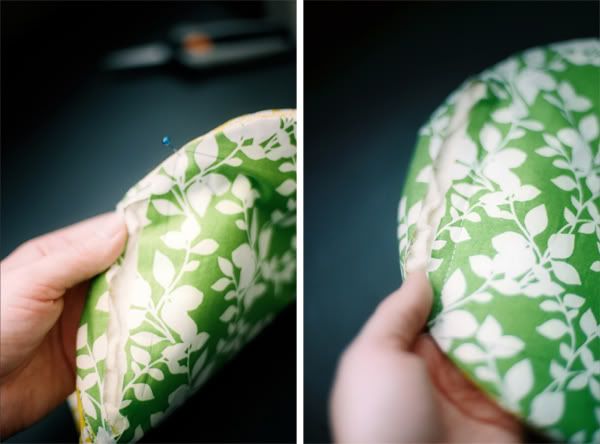
Turn inside out and iron flat. (Did I mention I hate ironing and may or may not have ironed mine? Or maybe only half of my quilt? I know, sad.) You will be left with your little slit to one side. It is scary, I know, but please don't worry, all will be well.
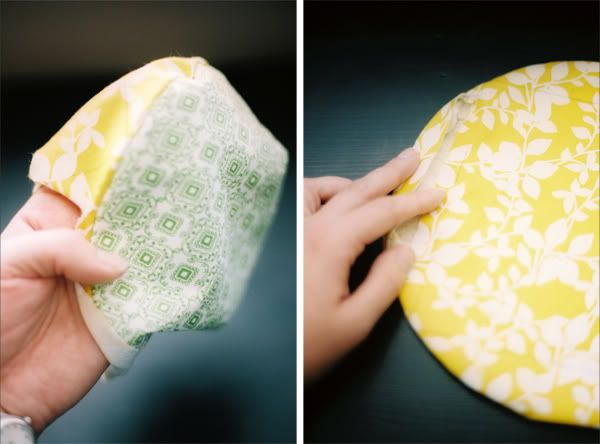
Remember the 7" square template you made? Time to get that out and on the side with the slit you need to trace a square. Check out the photo below on the right. You can see my markings. I used a pen, you can too, I promise no one will ever see your tracing lines.
Remember the 7" square template you made? Time to get that out and on the side with the slit you need to trace a square. Check out the photo below on the right. You can see my markings. I used a pen, you can too, I promise no one will ever see your tracing lines.
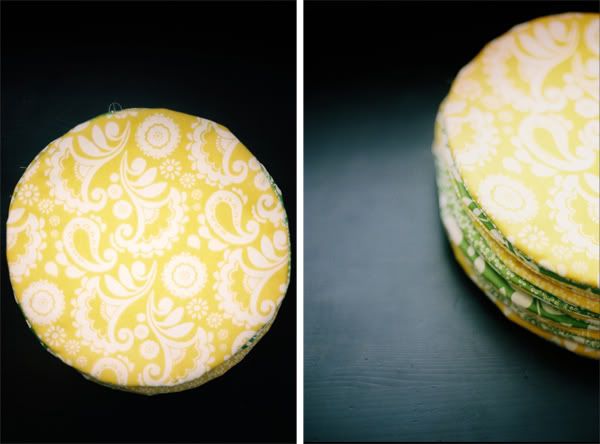
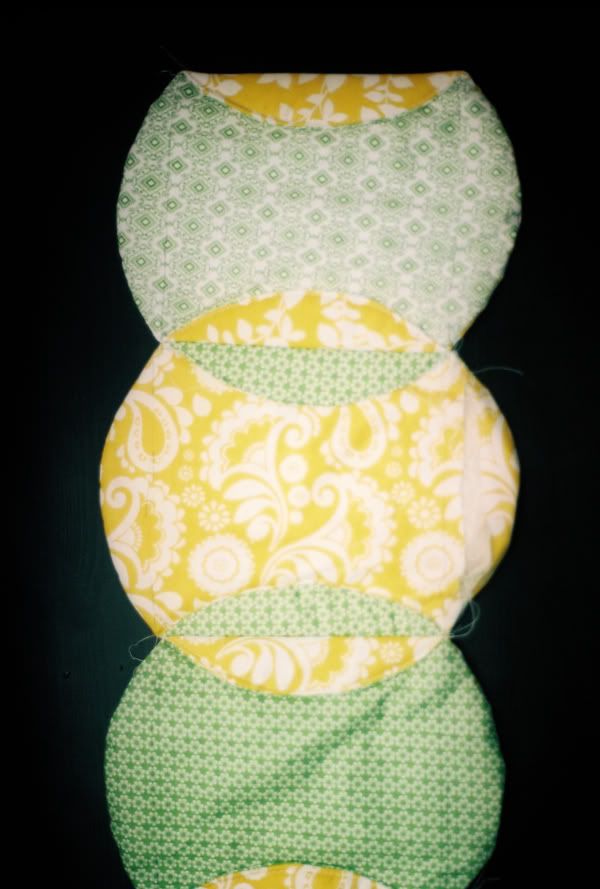
Continue forever doing all 144 of your bubbles until you have a stack that looks like this. Can you sort of see how the color goes every other one? Kind of? (I am a terrible teacher.)
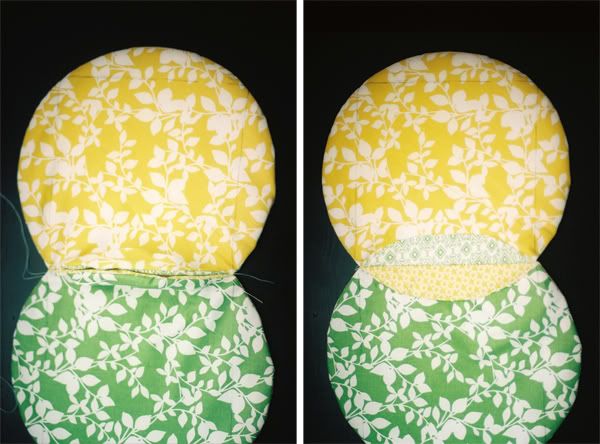
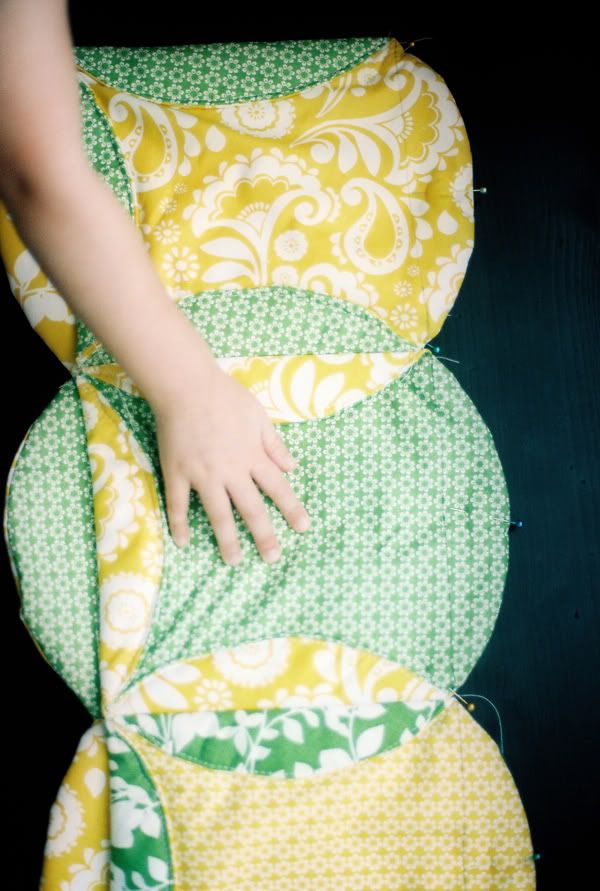
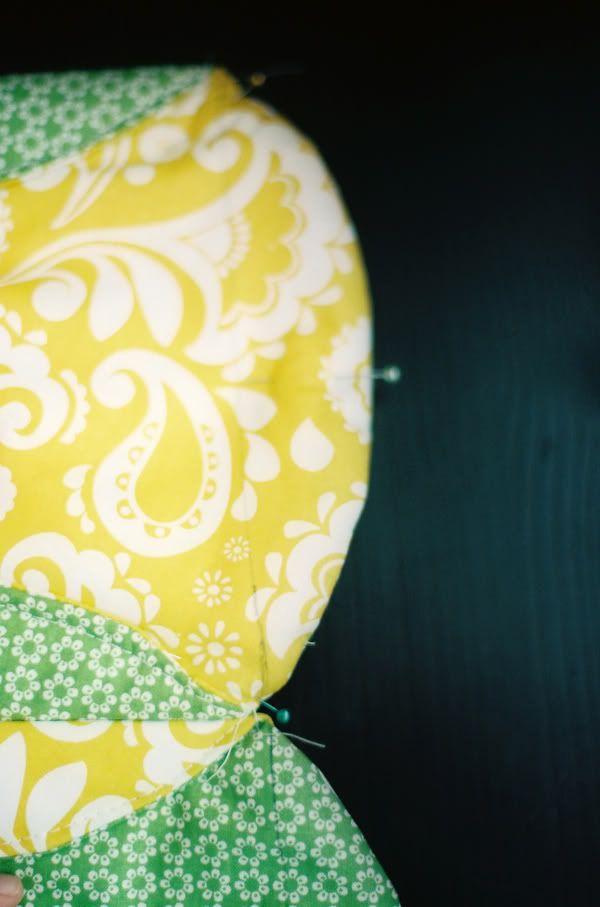
Next comes the sewing, when all of it finally comes together. This quilt definitely needs to be pinned. There is no way you can sew it without doing so. It is just too bulky and needs to be quite precise or else it will not line up properly. I promise. This is coming from the queen of short cuts. Begin by sewing one light and one dark circle together. Line the straight squared lines together and pin at each end of the line. I hope that makes sense. See on the left there how the pin is at the 'corner' of the square? Please note that the slits in your fabric need to always be facing 'up' not down underneath your fabric. If you don't you will have to unpick. A lot. Sew that sucker together along that line and you will end up with something like the photo on the right.
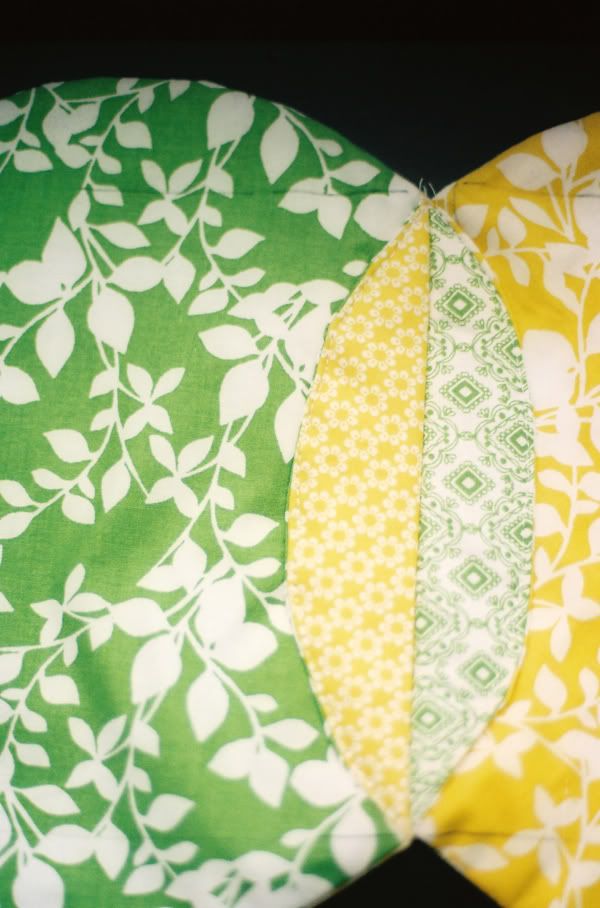
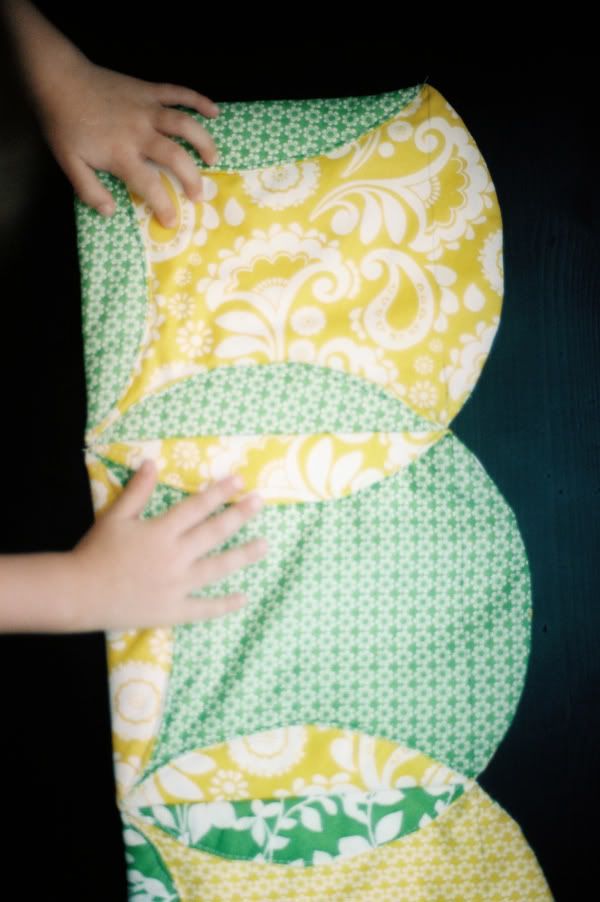
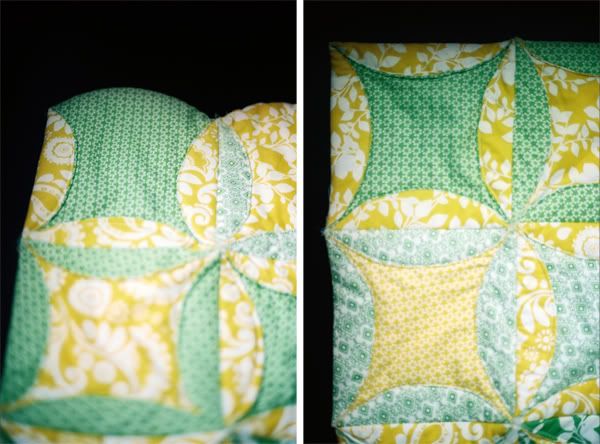
Your two bubbles will look like this when sewn together. On the left you can see where they are sewn together and the extra bubble bulk is sticking up (kind of hard to see, but once you iron them down you will be able to see them better.) Then, you need to sew these rounded edges down flat. This is where the 'quilting as you go' comes in. It is super fun to watch this little guy, er uh...big guy come together. You can see on the right the bubbles are beginning to form and peek through. Total optical illusion. I love it.
Here they are a little bit closer:
I wanted my edges to have a straight seam. You can see in a photo below how you can leave your edges unsewn so they become scalloped looking. I preferred mine to be sewn so I did it. Just turn your circular edge along that square line and sew like this:
Continue onward until you have 12 bubbles quilted together. Then make another strip of 12 bubbles and pin and sew and quilt onto the first strip, until you have 12 strips.
Here you can see what it might look like with a scalloped edge, and here on the right the edge I preferred. Sorry I don't have a better example, I didn't think until later that you might want to see that. (See, terrible teacher.)
Close up of the back of the quilt. It looks very much like a patchwork quilt, and you can see the circles quilted into each square. So pretty.
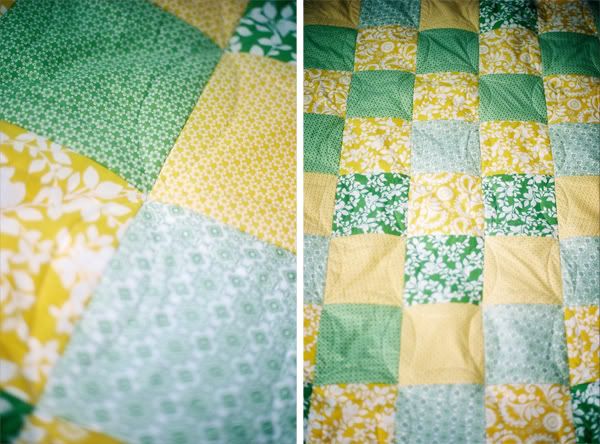
Here you can see the front of the quilt. A close up of the bubble. It makes such a pretty pattern. On the right is the finished quilt with the peek a boo patterns poking through.

Things I learned:
I would make this quilt again, except I would use only two fabrics, one light and one dark to really get the stained glass effect. I think it would 'pop' more if I did. This quilt, while I love it, seems lacking.
This quilt is HEAVY. I might try it with JUST the cotton fabric and no batting. Although I am afraid. I am not sure how well it would hold up or if I would think it was too light for a quilt.
I would definitely make one out of flannel for a baby shower. Totally tiny and totally cute and totally easier than the batting which can get thick at the corners.
I broke no less than 15 needles when sewing this quilt. Did I mention it gets thick at the corners and that I am not patient?
That is about it. Let me know if you have any questions, and again, if you decide to make one, send me a photo I would love to oogle it.
Much love,
Kim
9 comments:
Lovely job my dear! It is a beauty. I wish I had a good pic of my sister's scrappy version. She does love it. I'm thinking flannel is definitely the way to go though. Much, much easier!!
LOVE this idea! It took me more than a few minutes to understand but when the light bulb went off it nearly blinded me!
Lacking?! Lacking what!? It's amazing! You crafty lady, sheesh!!!!! What don't you rock at!?
wow, that's beautiful! I just pinned this. :) But maybe I should learn to sew first...
Holy crap. There's not enough Diet Coke in the world for me to get through that quilt. But I am happy to raise my glass to you. You're amazing!
Wow! This is beautiful! You sew to? What else do you do? You amaze me everyday. xoxo
Kim. Seriously? You made that?!?! Awesome awesome!!!! Someday, can I pay you to make one for me? (I have no crafting skills whatsoever and I've learned it pays to pay...) Good job!
If you decide to do another quilt in this pattern, consider tracing your circles onto fabric, sew together with right sides facing, then trim close with pinking shears, saves lots of time. Then to reduce bulk, and conserve needles, use your 7 inch square to cut out squares of batting, stuff the batting into the rightly slitted and turned circle, make sure the corners lie flat, they will form a perfect line for you to sew down, saving you the time of tracing on the fabric and helping to reduce some bulk at corners.
Took your advice and stuck to two colors. Made my circles by cutting fabric into 11" squares (not too particular either)and using my circular attachment on my sewing machine (you tube has directions to make one too)I sewed the 10" circles, all were perfect, then I just trimmed down seam to approximately 1/4" and slit/turned. Worked perfectly and saved time. I also made mine using three pieces of quilting cotton which made a great weight and easier to sew, plus I used 108" muslin for "batting" and saved a couple of yards (27 11" squares/yard). love this and worked very well for me!
Post a Comment