Saturday, August 11, 2012

Ikea? I HEART YOU!

I remember when Ikea moved to Utah in 2007. We had just moved too! After the move into our new home, we went crazy furnishing our place with all things Ikea. We still have that furniture, and it looks awesome. Over the years we have gone back to Ikea for various date nights. We adore looking at all the new items, and the free one hour childcare, it is truly the best.

Recently, Ikea invited me to come have breakfast and take a walk through their store to check out their new look, and to oogle their lovely new items. They even treated me to a $25 shopping spree!

Breakfast was DELICIOUS. I loved the french toast sticks and may have thought about stealing some off of my friend's plate when mine were all gone. Breakfast at Ikea will definitely be something I do with my kids in the near future. They will love it!

After breakfast I strolled through the new store layout. I loved the fresh white furniture with the bright textiles, throws, and pillows. It was definitely an amazing experience and made my local Ikea feel brand new.

My favorite things to check out were the new bathroom items and appliances. So sleek and modern. Always classy and not something that will go out of style.

The entire catalog is delicious:


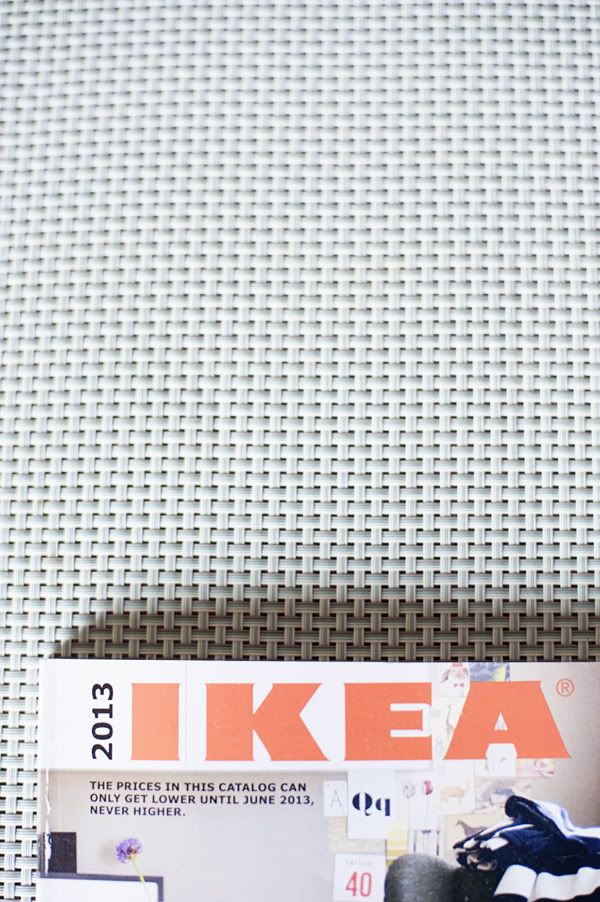
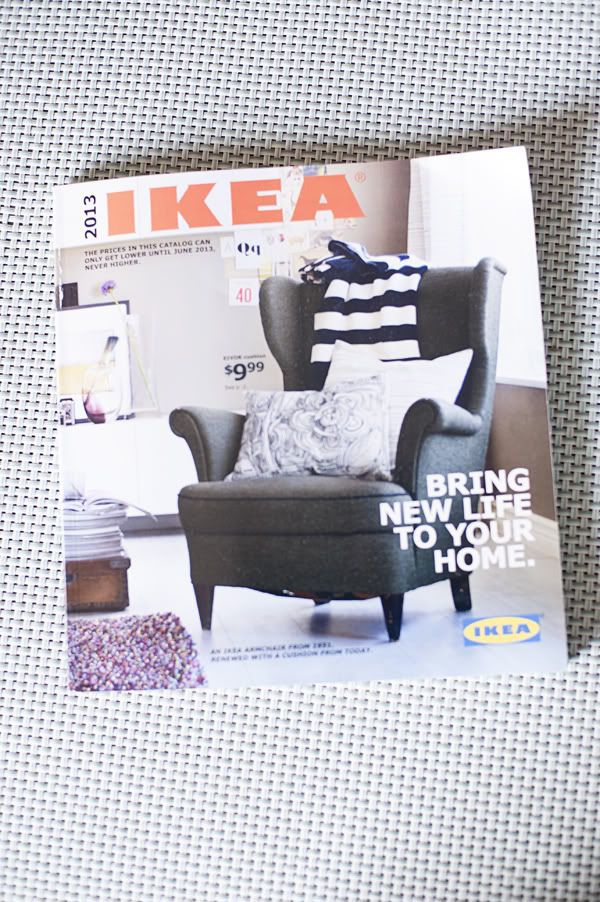
It was SO hard to decide what to get with my Ikea cash. Basically, I love everything at Ikea that I ended up spending a lot more than $25.

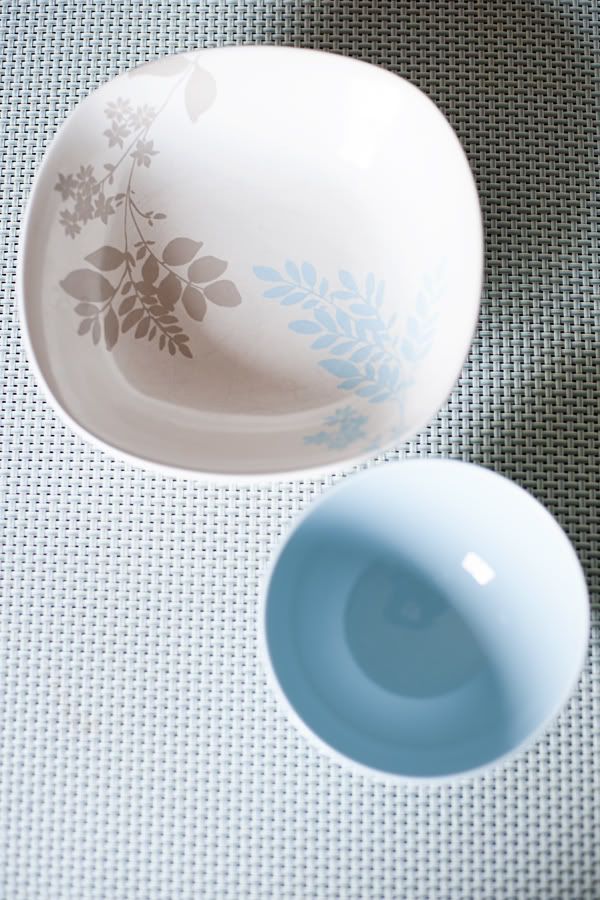
That day? I saw these lovelies and I had. to. have. them.


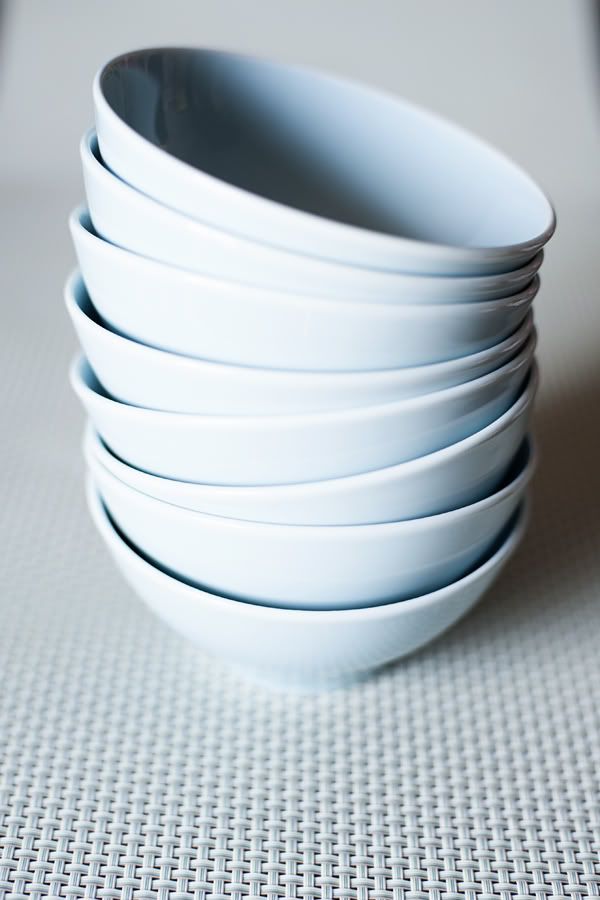
I knew that these pretty 365+ bowls would be the perfect addition to my current tableware situation. I was so excited when I got them home and they coordinated perfectly with my place mats and dishes.

SCORE.


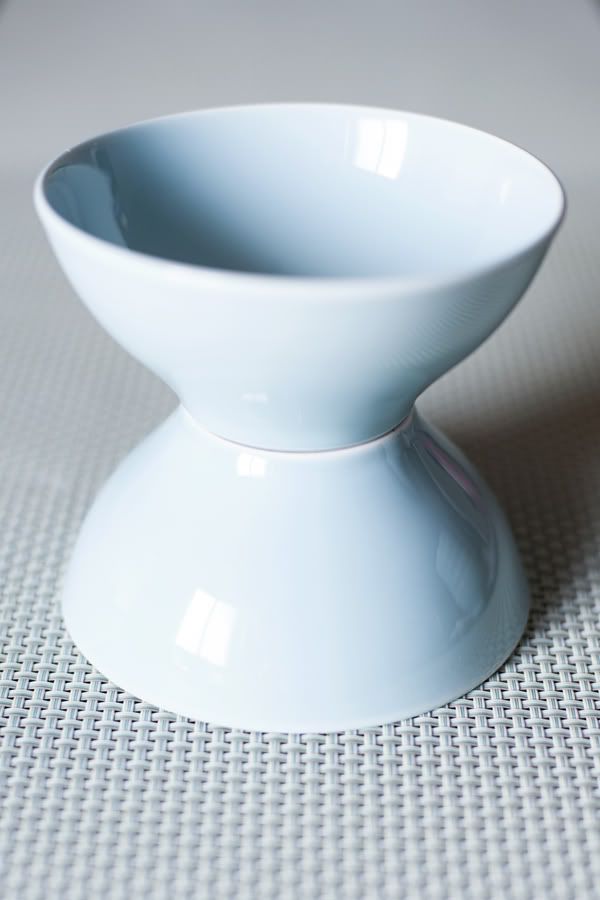
I love to entertain on special days like anniversaries and birthdays. While I was at the store thinking about the dishes I had at home, I had this brilliant idea to use the 365+ bowls to create height in my next entertainment table.

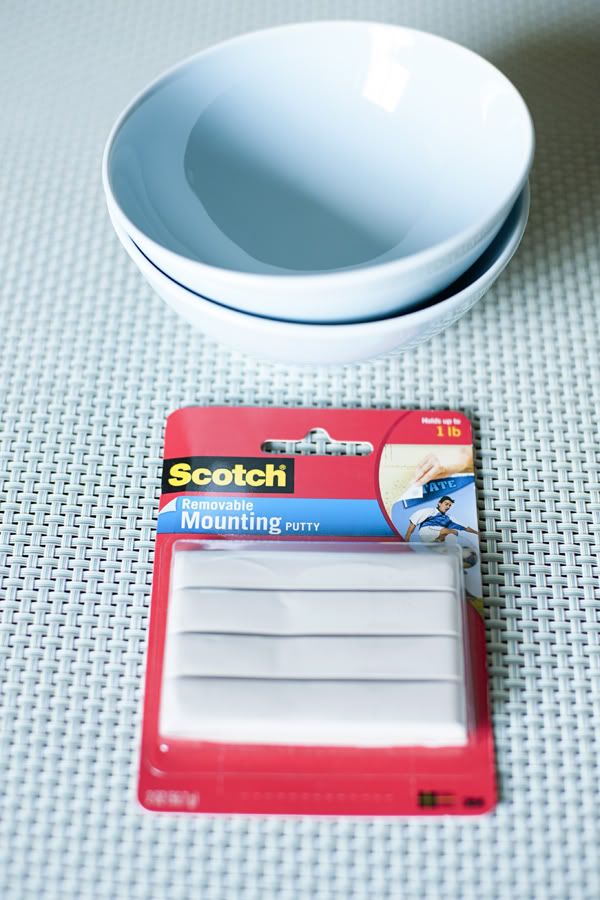
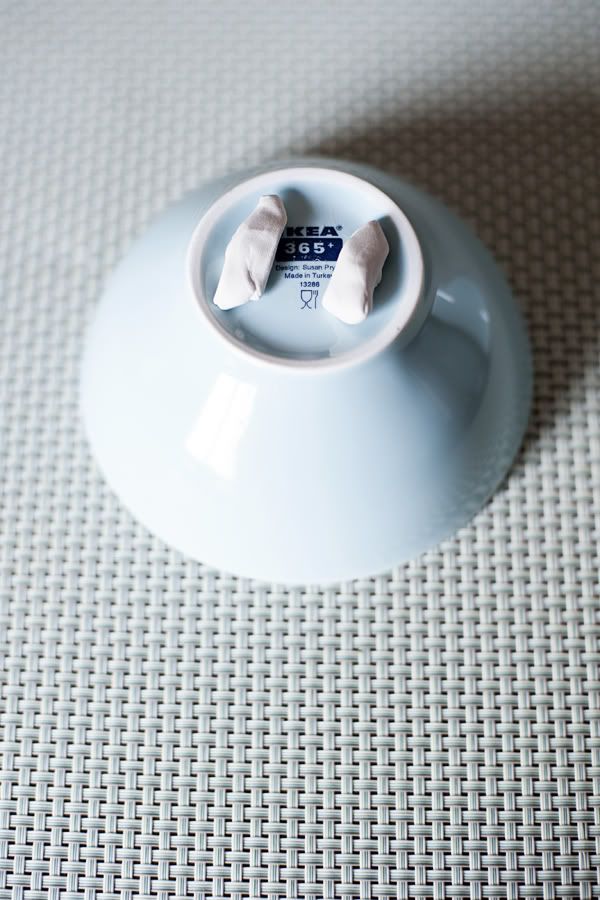
On my way home I picked up some removable mounting putty so that I could stick my bowls together for the event without having to sacrifice my bowls permanently. The best part? Everything would be reusable, and I could configure the bowls any way that I wanted. 


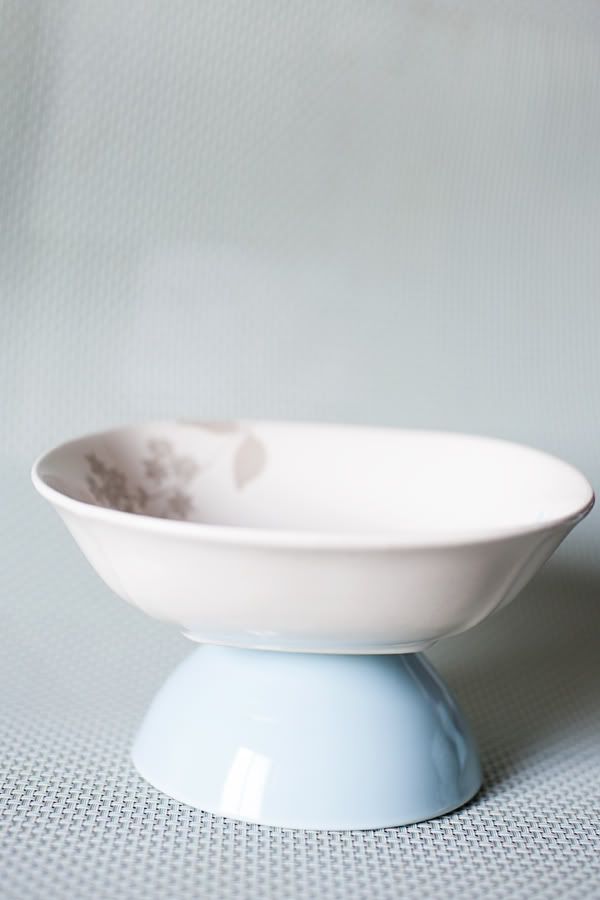
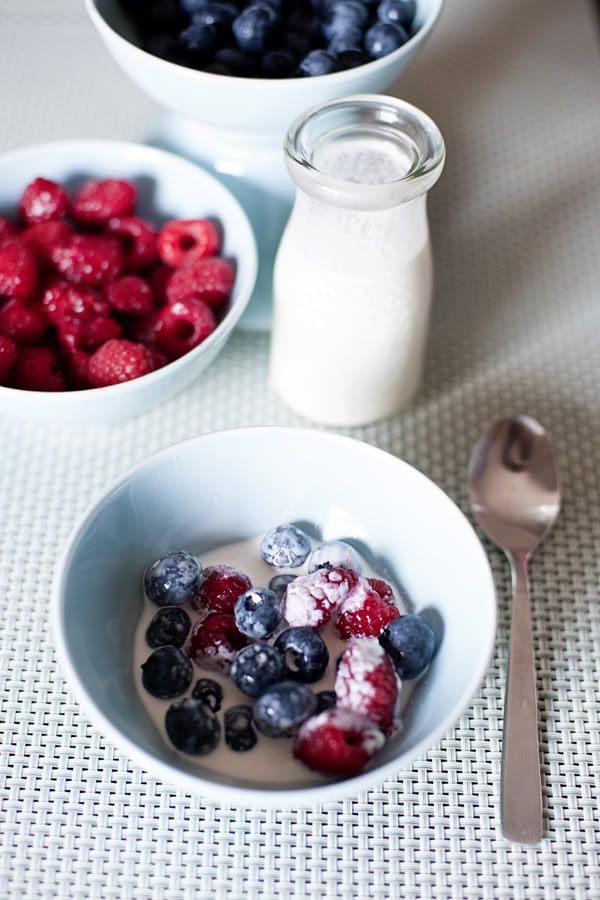
Then it got even more fun when I stacked two 365+ bowls on top of one another.


The aesthetic as well as photographic capabilities just became endless, so, I tried them out for our Sunday berry treat.


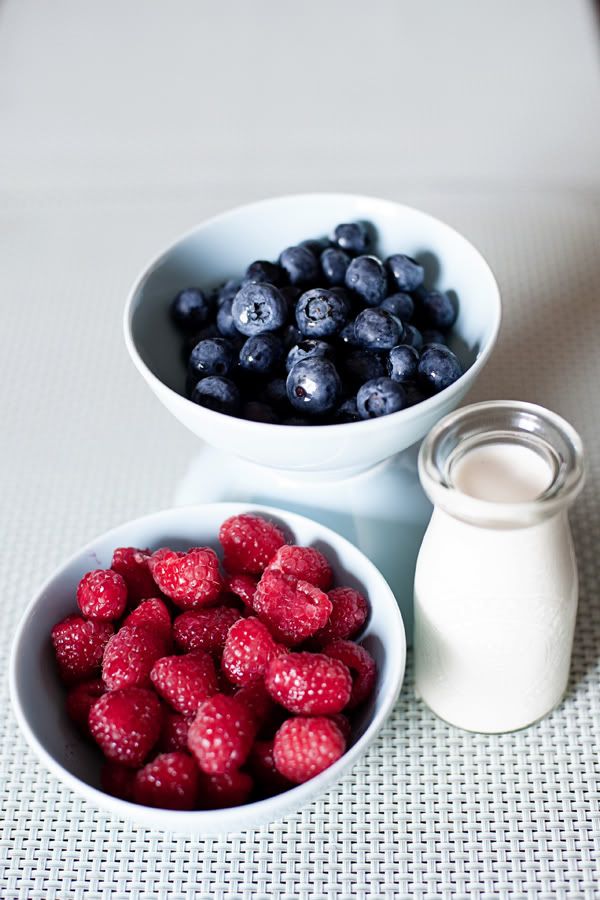
Beautiful, delicious, and surprisingly patriotic!


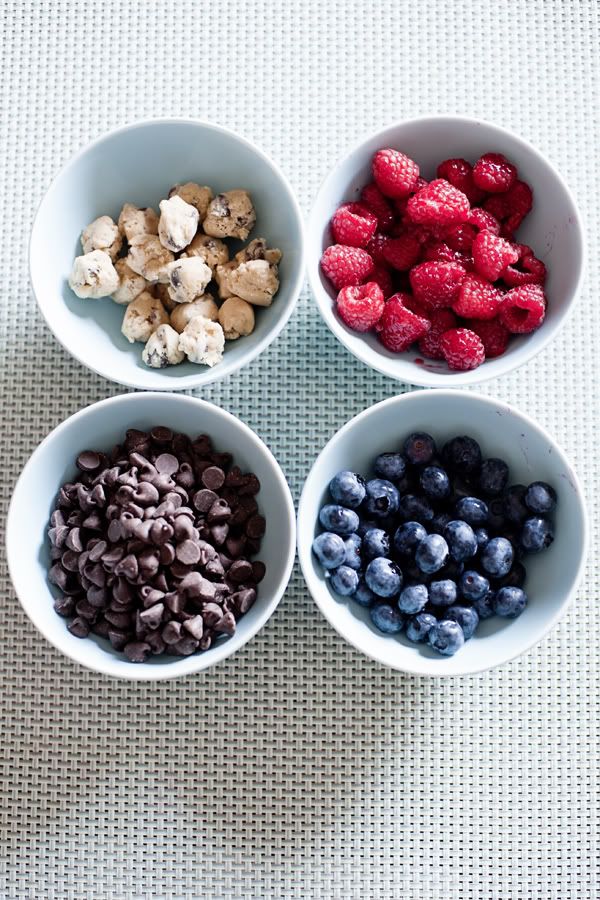
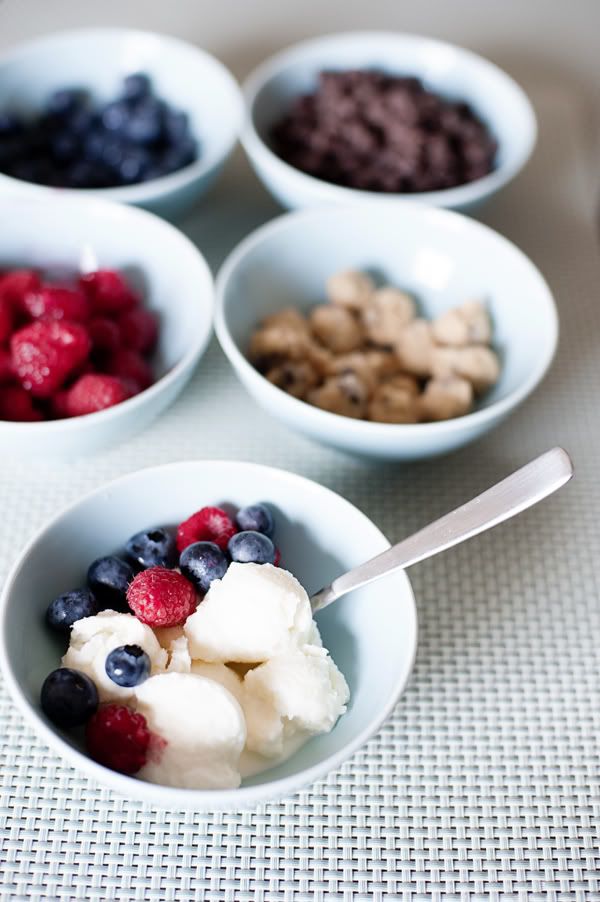
A few days later we found another fun use for our 365+ bowls when we made homemade ice cream.
We used the bowls to house all of our different toppings. We like fresh fruit as well as chocolate and homemade cookie dough. (Can you tell it is berry season and that we go through them like crazy? Delish.)


Thank you Ikea for inviting me to see your sparkly fresh store, and for the gift of these beautiful blue bowls. They are the perfect serving size for just about anything, and I am in love with all that they can do. 

**Disclaimer: I was invited by Ikea to see the new layout and design of their Draper, Utah store. I was given a $25 gift card to purchase anything in the store I wanted for that amount. My opinions of Ikea are solely my own.**

Friday, August 10, 2012

Camilla's Quilt Part 1 | Riley Blake Fly a Kite Fabric

While browsing fabric stores online, I came across "Fly a Kite" by Riley Blake Designs. I immediately fell in love long before the line was released and put myself on the waiting list to be one
of the first to snatch up a few fat quarter bundles.


I adored the playful theme and bright colors of the fabrics, and what drew me into it the most were the strawberries. I have loved strawberries since I was a little girl. Not just eating them, but anything strawberry themed...I loved, and still do. This fabric line was no exception.


You may remember my last bubble quilt. I loved it so much and learned a lot from it, I decided to give it another go with a few alterations in order to make my life easier. Since this quilt was for little Camilla, I wanted to make it big enough that she could use it on a queen size bed. I didn't realize logistically how much fabric I would need (therefore, keeping my favorite quilt shops in business), as well as ultra time consuming this quilt would be. As it is finally coming together I can tell you it has been worth every minute of Bones and Scrubs reruns. Thank you Netflix!

The first thing? Cutting the circles:


The goal is to end up with a huge stack of perfectly cut circles. When I say huge stack, I mean the photo above is only 1/8 of the quilt. Yes. Yes.

I started off by starching and ironing each of my fat quarters. This enabled me to get them to lay as flat as possible and allowing me to get 4, 8.5" circles out of each fat quarter.


Of course, having a messy faced, sister-dress wearing little girl to help is half the fun.


After I ironed the fabric, the fun began. I purchased this little lovely for 50% off at my local fabric store. I wish that it could cut bigger circles than 8.5", but it didn't, however that turned out to be lucky because, as I mentioned I barely cut 4 circles out of each fat quarter at the 8.5" size.

This is quite possibly one of the coolest quilting gadgets around and if you don't have one, totally get one and create a quilt using circles. I am in love.

Olfa Circle Cutter:


I folded my fabric exactly in half so I could cut two circles at a time.


I carefully eyed the center of where the circle should go so that I made sure I left room for the other two circles to be cut out of the fat quarter. Nothing like making a mistake and ending up with a straight sided circle. That would be very sad.


Hold the little cutter on the pivot point and swirl it around. The blade is SUPER sharp, as is the pivot needle. I may have poked myself more than once, but luckily no cuts. After cutting no less than 1,000,000 circles I may have had some wrist pain, but it comes with the territory.


Finish up the fat quarter by cutting the other two circles, then give your scraps to friends who are making a Dear Jane quilt, then discover that you are obsessed with that Dear Jane quilt and next time you cut circles keep your own scraps.


Voila. Beautiful and perfect circles. The 8.5" size leaves a .25" or (1/4") seam allowance, so when the circles are finished you will end up with 8" finished circles.


Dig in and cut all of your fat quarters, as I mentioned you will need no less than 1,000,000 circles. (I may be exaggerating, when the quilt is finished I will let you know how many you may need.)


Don't forget to take two photos and allow your helper to put her little hand in one. It makes for a fun post. Are these fabrics not the most delicious you have ever seen?


Work on your quilt for three months only to determine you don't have enough fabric. So, order some more fabric. When the fabric comes and spring hits, and you go to photograph the rest of your tutorial, realize that the lighting in your photos is so drastically different, because your first photos were taken in the winter and processed at Walgreen's, and your second photos were taken in the spring and processed at your preferred lab. Then pretend that no one will notice anyway, but that your mistake allows you to photograph the next step of your tutorial and everyone will be so grateful they won't even notice the changes.

Sew each top side quilt circle right sides to your backing fabric circles leaving a quarter inch seam allowance. I went with a cream backing and a pink gingham backing. (When the quilt is finished there will be a checkerboard of pink gingham and cream squares...photo to come.)

The second thing I am doing differently from last time is cutting my batting into squares instead of circles. I wanted to cut down on bulk and needle breakage. So I measured my circle, found the size of square to fit inside. (It is about 6")


I used a rotary cutter and mat to cut the squares.


After I cut about 500,000 pieces of batting, it was time to get the batting to stay in place. This is where Quilt Basting Spray comes in SUPER handy.


I got a deep box and stuck a stack of my batting squares inside. I sprayed one side lightly with batting spray.


I took that piece off of the top, flipped it over and 'glued' it to the quilt top fabric side of each circle. This step is important. If you are like me and tired at 1 a.m. and on episode 101 of Bones, you will start to glue them to the backside. As you will see in a few steps, this will cause you to cut your backing fabric, and then you will cry when you realize that you have to order more fabric...thus continuing to keep your favorite fabric store in business. Thanks Angie!


Time for cutting.


Carefully separate your backing fabric from your quilt top fabric and slice a small hole only through your quilt top fabric. Cut along the edge of your batting so that you can turn your circle inside out.


Open the hole and flip your fabric right sides out.


You will end up with a deliciously messy stack of fabric circles.


Next (or it would be 100 times smarter to wait to do this step until after you iron, but again, I like difficulty) take the same template you cut to fit your circle and start drawing your squares. Remember to see my last tutorial if you feel a little lost.


Trace a square on your quilt top fabric, make sure to line the edge of the template along your cut fabric line. This helps ensure that your square batting piece lines up with where you will be sewing later. Continue to trace until all 500,000 circles are done.


Next, set up shop in front of your favorite Netflix shows. You will be ironing for a few hours.

We are going for perfect circles here, so I used a butter knife to help pop out my edges while I ironed.


Just slide the knife in the cut slit and kind of trace the lines as the iron glides the fabric.


You will end up with a pretty flat, almost perfect circle with the square piece of batting in the center. Like a little quilt hamburger bun.


Finish up the stack.


You will end up with stacks that look like this:


Stay tuned for post number 2 of Camilla's Quilt. She is very excited about it, and I am too now that I am 2/3 of the way done. Can't wait.

Happy Friday.