
I know this is up later than I had hoped, but let's just say that the new Photobucket hates me and it took me as much time as it would have to learn Cantonese and I probably would have picked that up faster than trying to create this blog post. Needless to say, I have it finally figured it out, and hope that this means more blogging in the future.
First of all, Happy Valentine's Day! I have missed you. You may not know this, but I craft for about an hour a day. It is part of my new year resolution to spend more time in the real world, with real people, doing real things. Some of which involve me crocheting like an old lady, but that is a post for another day.
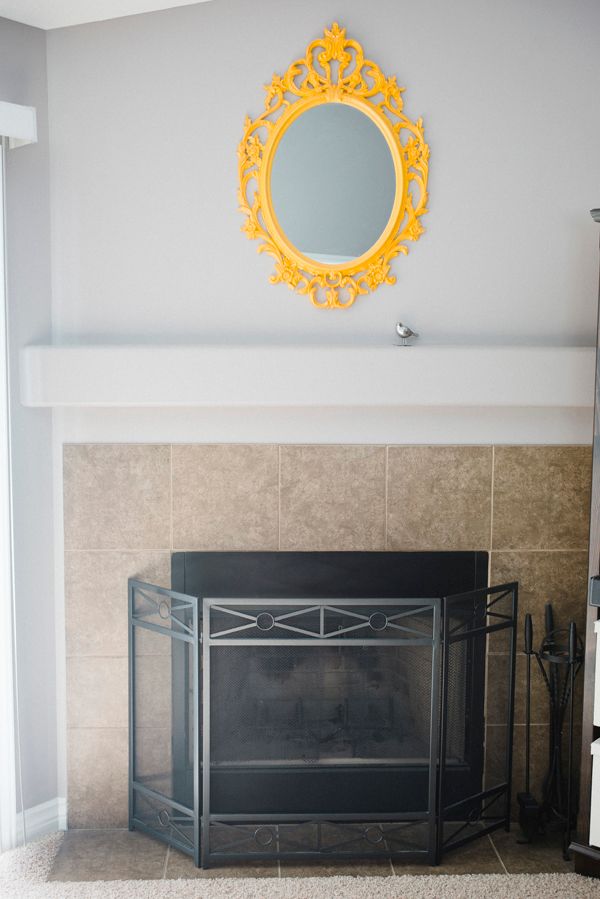
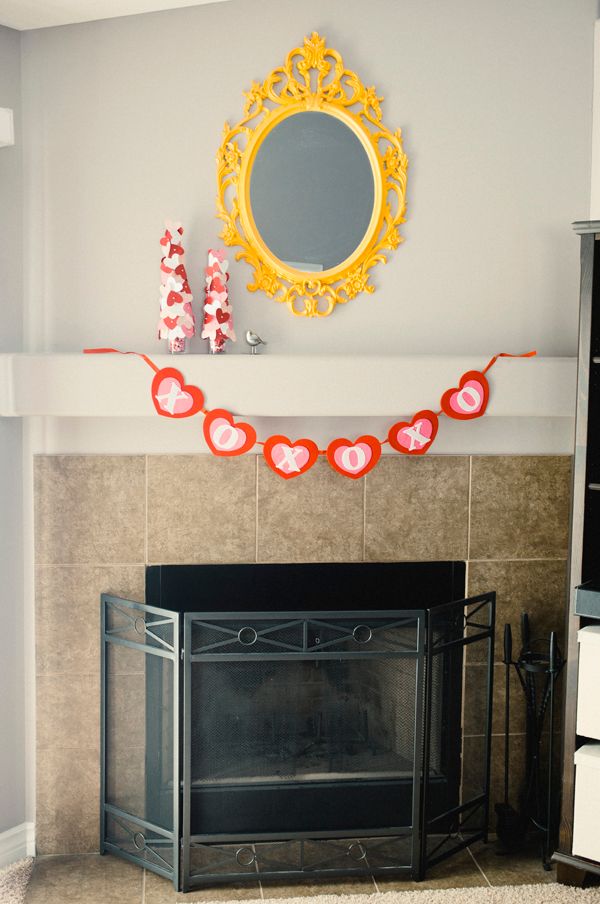
This is my pathetic excuse for a fireplace/mantel. We have been in our home for one and a half years and while I hate this area in my home, it just kind of is and has to be this way for a while. I avoid doing anything with it because, well, the mantel ledge is approximately 2" wide and not much can fit there, not even frames without the fear of them falling.
So this season, I decided that I would try to create something to jazz it up for my kids to make it a little more exciting.
Here is a fun little tutorial for creating a quick and easy Valentine's (or any day) mantel piece. Enjoy!
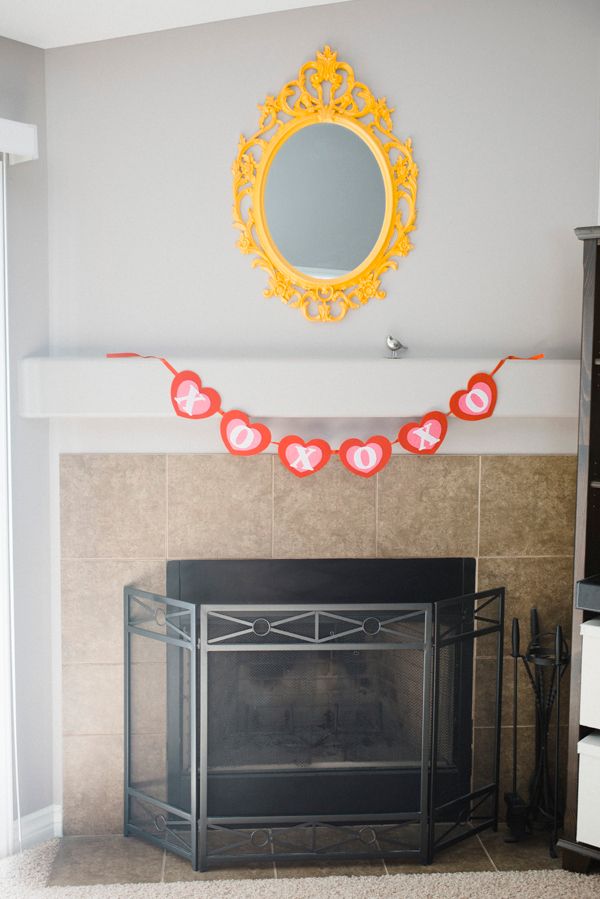
I started the season off right with this adorable xoxoxo garland for $3 from Target. Can you believe how freaking cute? I could not make a garland for that much so I bought one for me and another for a friend.
Alas, I felt like I needed to do more. I like simple, so even hanging this up was a big deal.
Alas, I felt like I needed to do more. I like simple, so even hanging this up was a big deal.
That is when I decided to take a trip to Walmart and their less expensive than Michael's Styrofoam forms, two tea light candle holders, some paper, pearl head sewing pins and my Carl cutter. I of course broke out the Cricut Mini. Oh my how I have come to love this little machine.
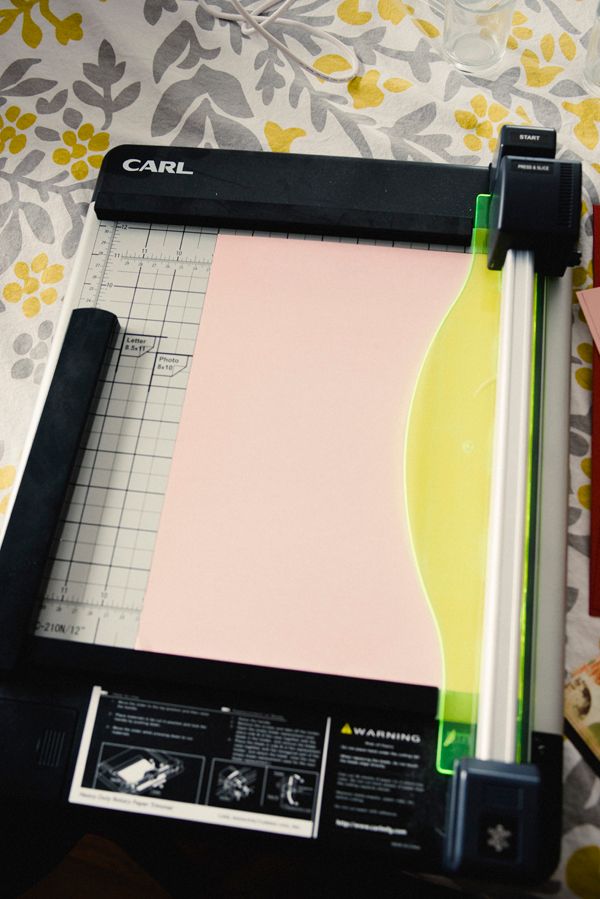
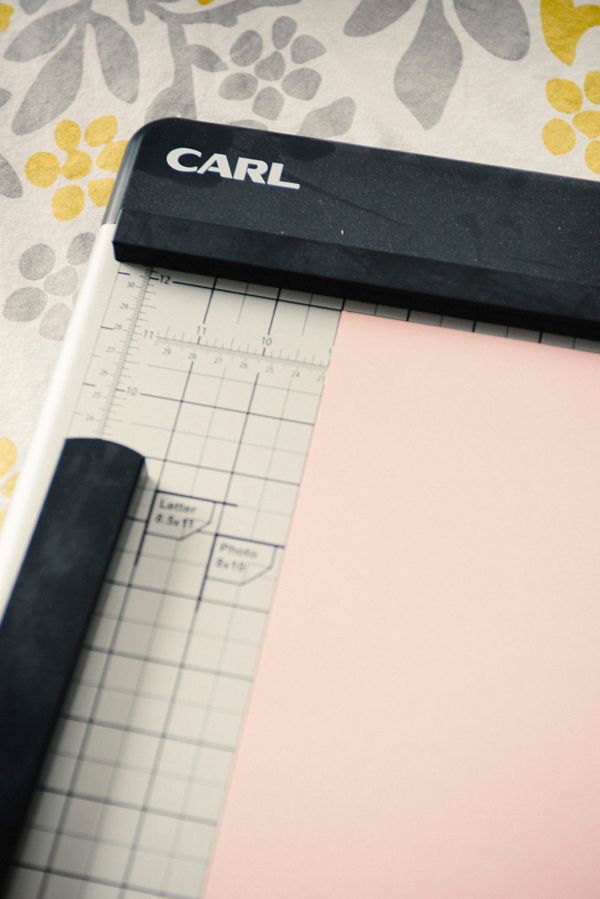
If you haven't gotten a Carl paper cutter/trimmer, you are missing out. I have had my fair share of rotary trimmers and my boyfriend Carl is hands down, by far my favorite. It cuts up to 35 sheets of regular printer paper at a time, and I use it 3-4 times a week. It is that bad-a.
He is also EXTREMELY dusty in this photo.
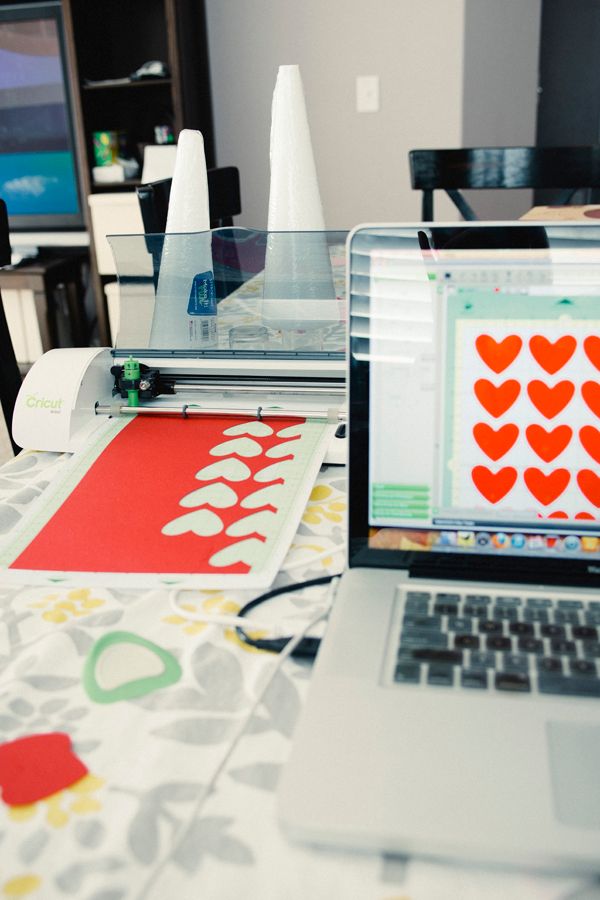
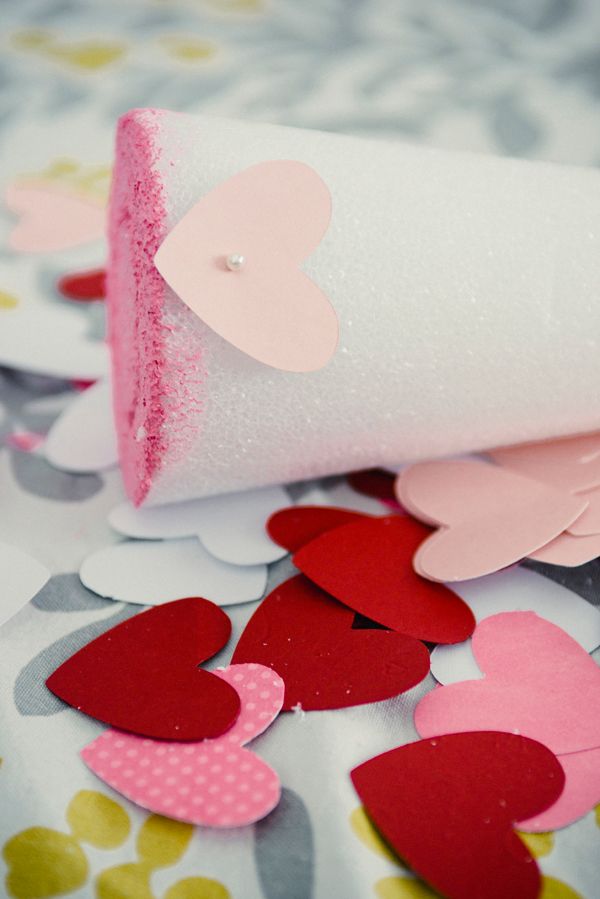
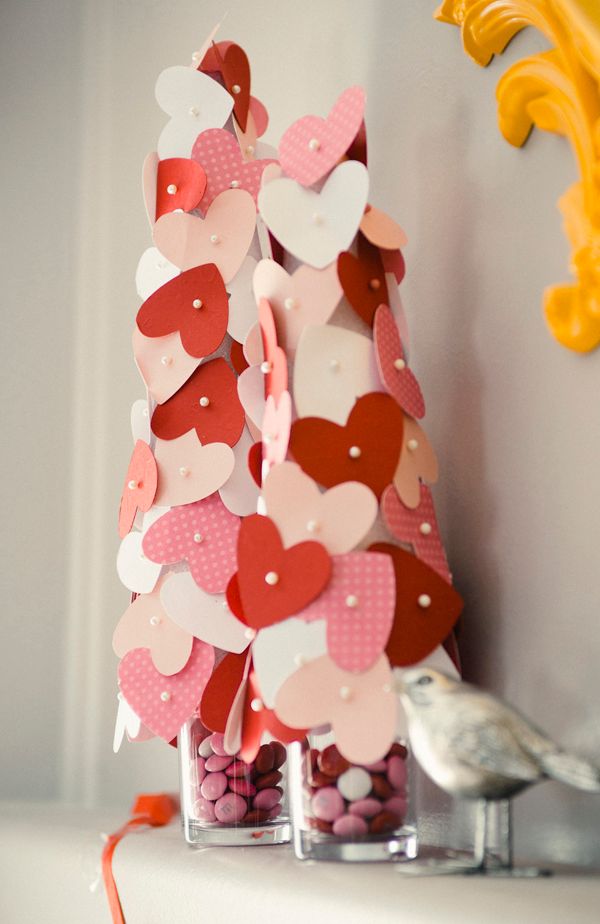
I laid out some hearts in the software and then cut red, white, and pink versions. I probably cut a million, who knows. Looking back I would have variegated the sizes from large to small, as you will see why in the next few steps, but whatever. I like things simple, and I am not a perfectionist and I called it good. BUT, if I ever made these for another holiday I would change the sizes and go smaller toward the top.
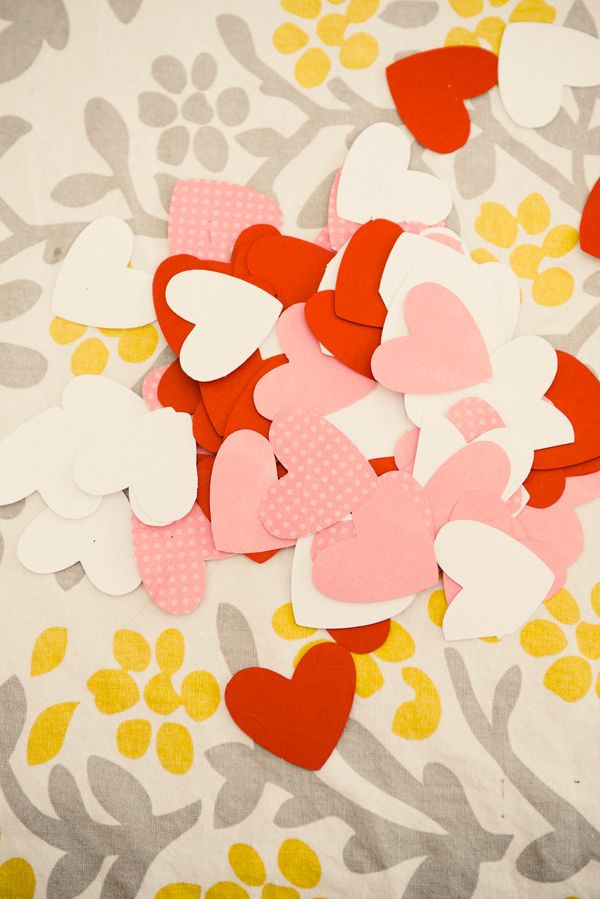
How fun are these hearts? They made adorable table scatter. Now that I have the beloved Cricut I will make my own confetti and table scatter for EVERYTHING. I am obsessed.
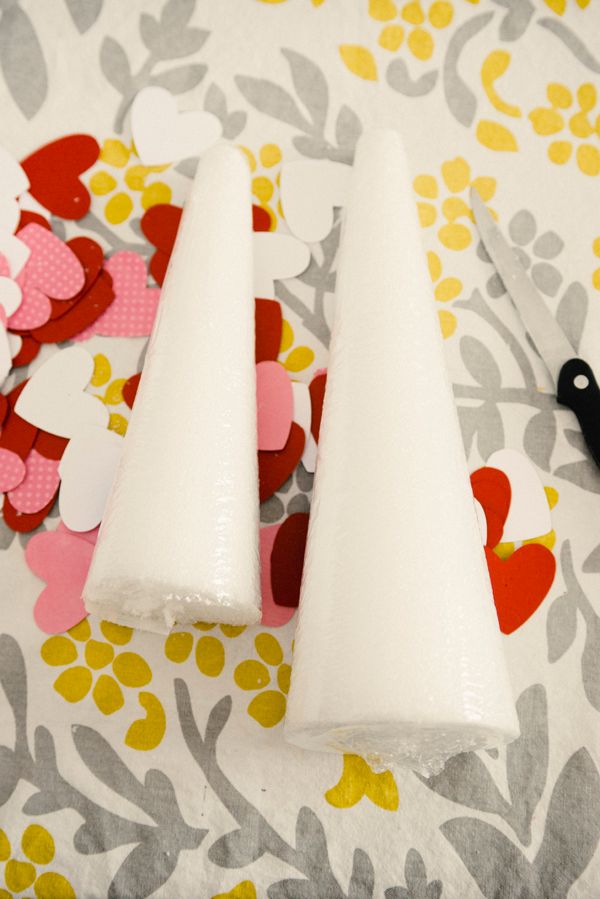
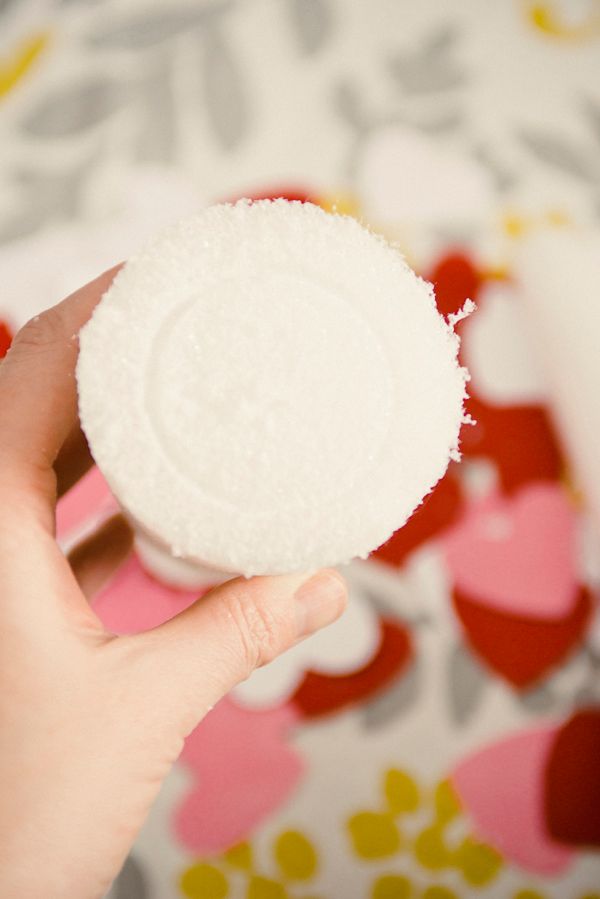
Now was time time for the real fun. I opened up the Styrofoam cones and the tea light holders I purchased.
Now was time time for the real fun. I opened up the Styrofoam cones and the tea light holders I purchased.
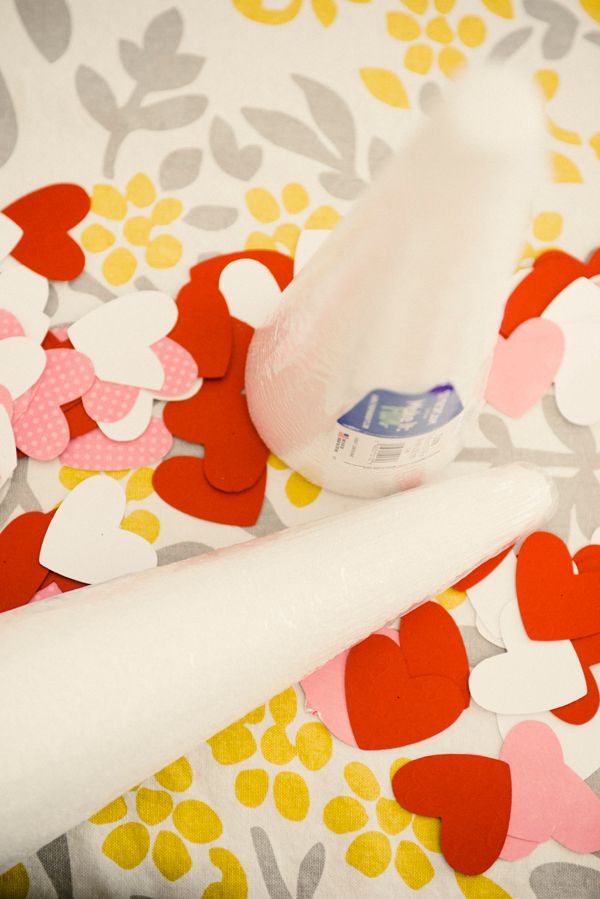

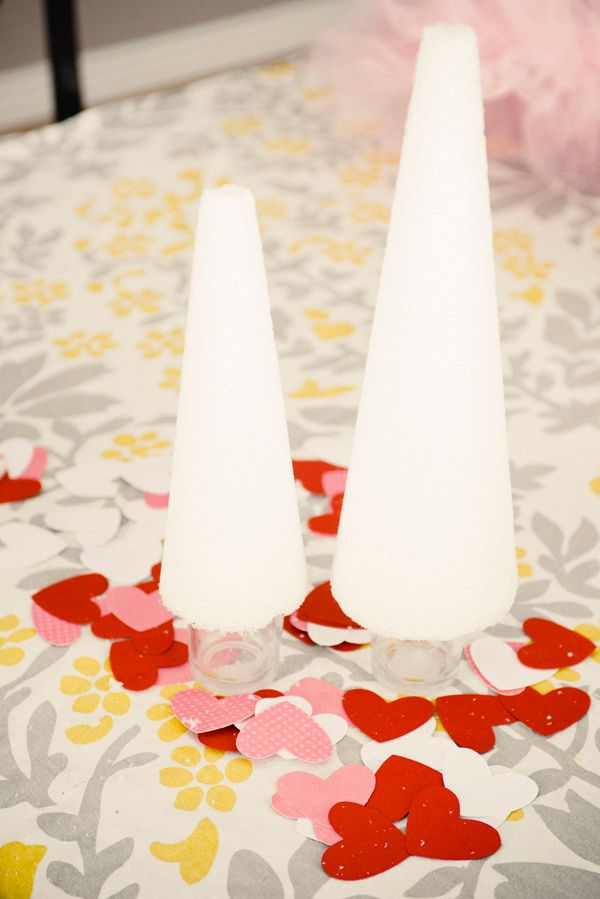
Then, because Walmart basically sucks and they only had one size of cone left in stock, I had to trim down one of mine to get the height difference I was going for. No biggie. I mean, who doesn't like to cut Styrofoam with knives?
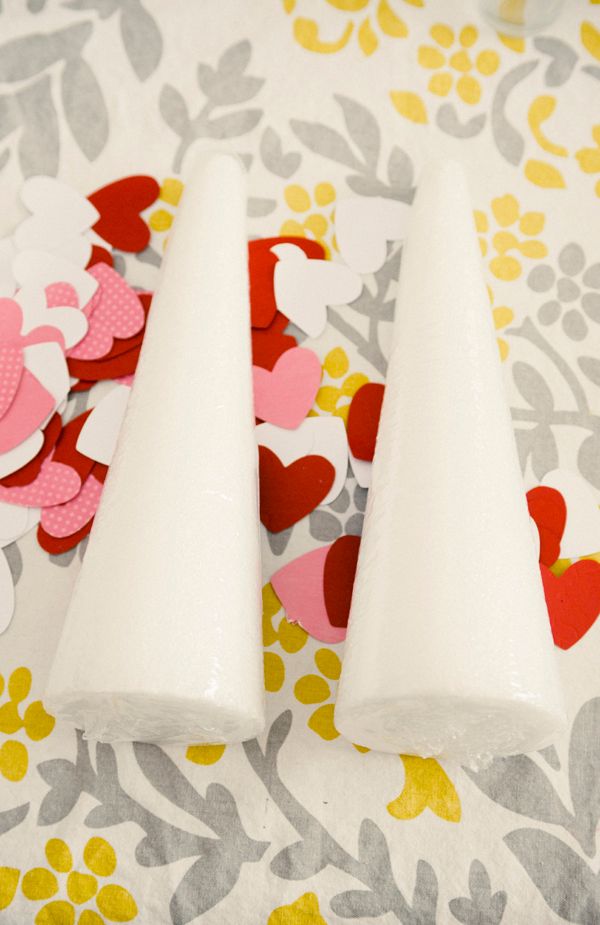
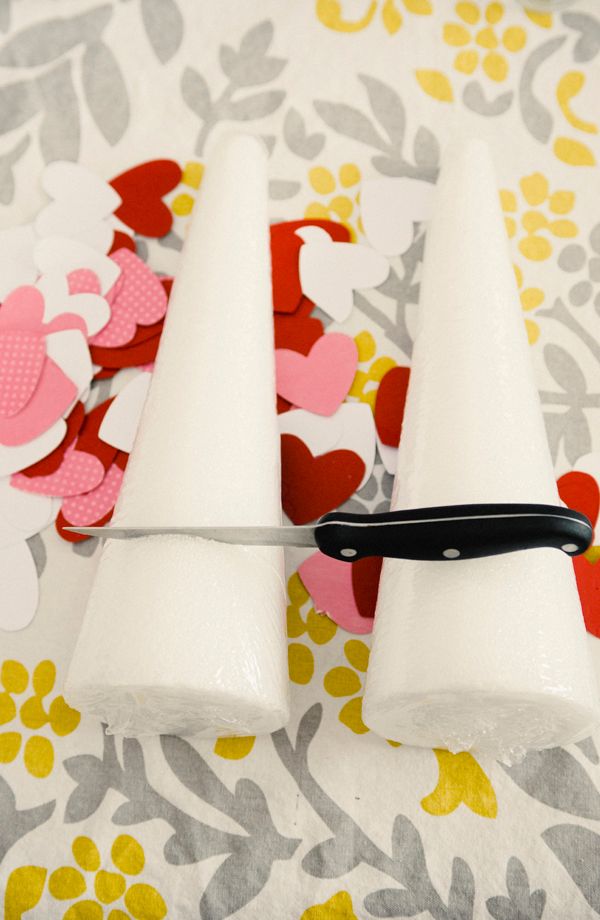
As you can see the little bits of Styrofoam ended up looking like snow, not too different from the day I made these little guys...it was a blizzard.
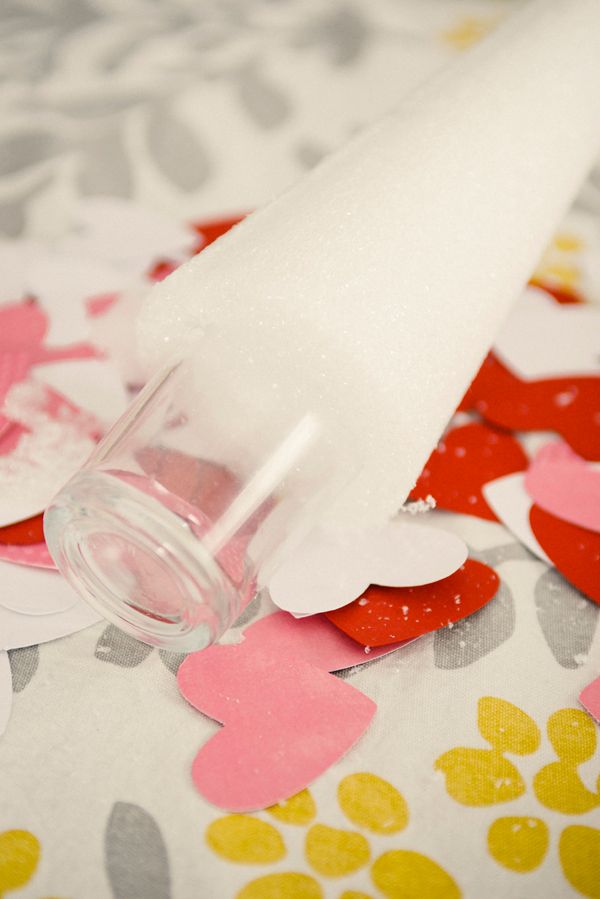
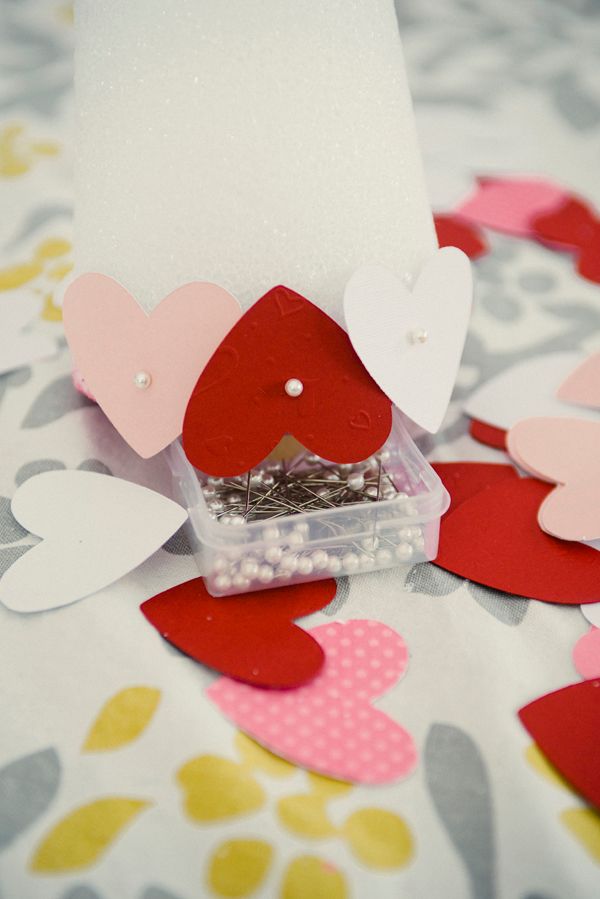
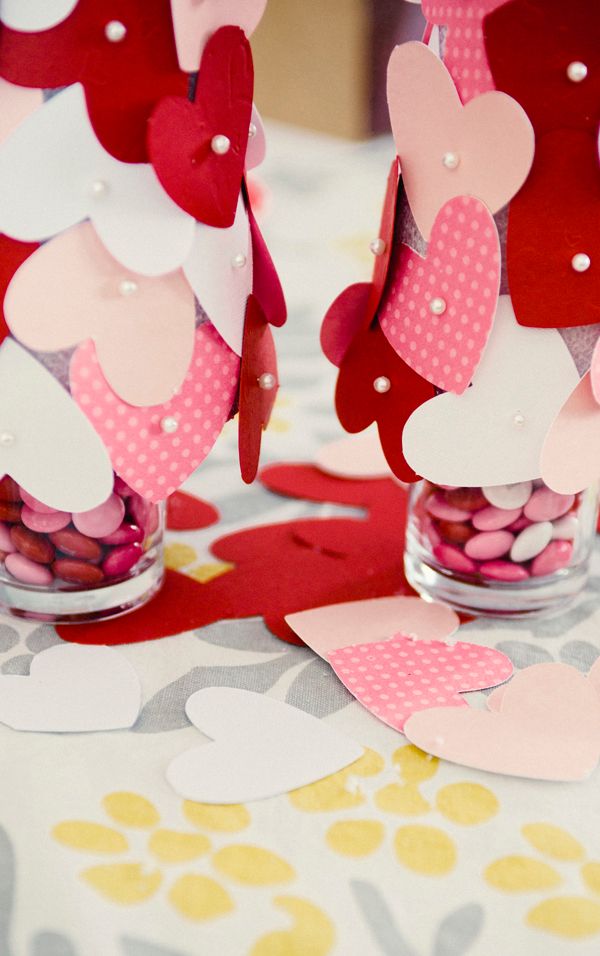
So my vision was to use tea light candle holders as trunks, but to create a 'lid' with the 'tree' so that I could put candy in the bottom, to make it more festive.
So my vision was to use tea light candle holders as trunks, but to create a 'lid' with the 'tree' so that I could put candy in the bottom, to make it more festive.
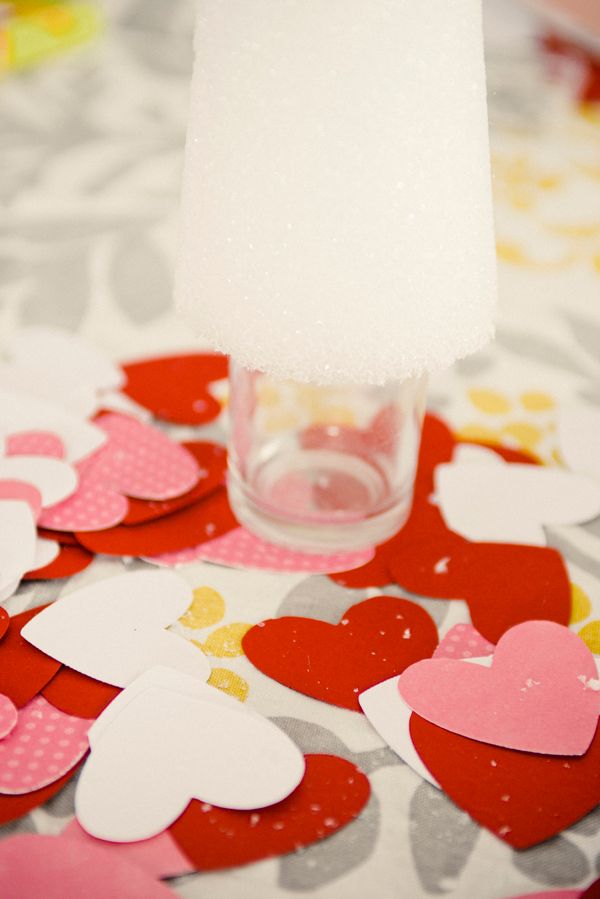
I kind of pressed the glass into the bottom of the cone to get an idea of where it would go.
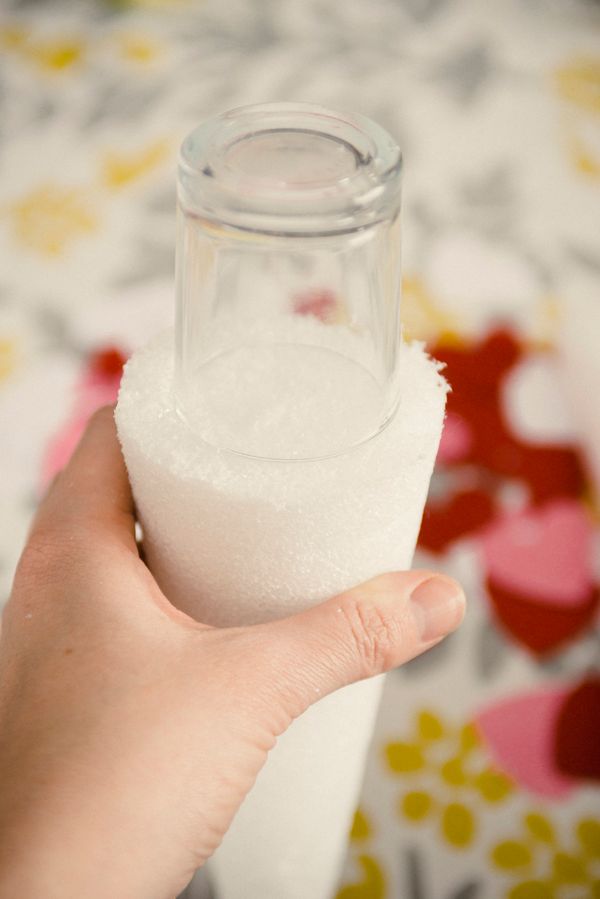
I then used my knife to make a deeper cut in the circle so that the glass would stay, and the cone would be more of the lid I was hoping for.
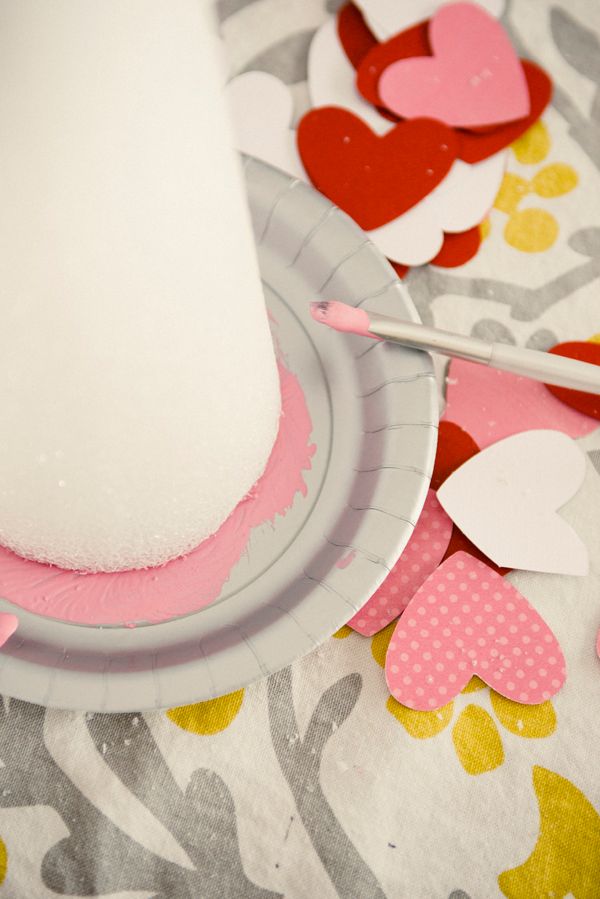
Remember all of that Styrofoam blizzard specks? Well, no one likes those in their candy, so I pulled out some pink acrylic paint to paint over the top and bottom of my cones to keep all of those little specks and seal them in place.
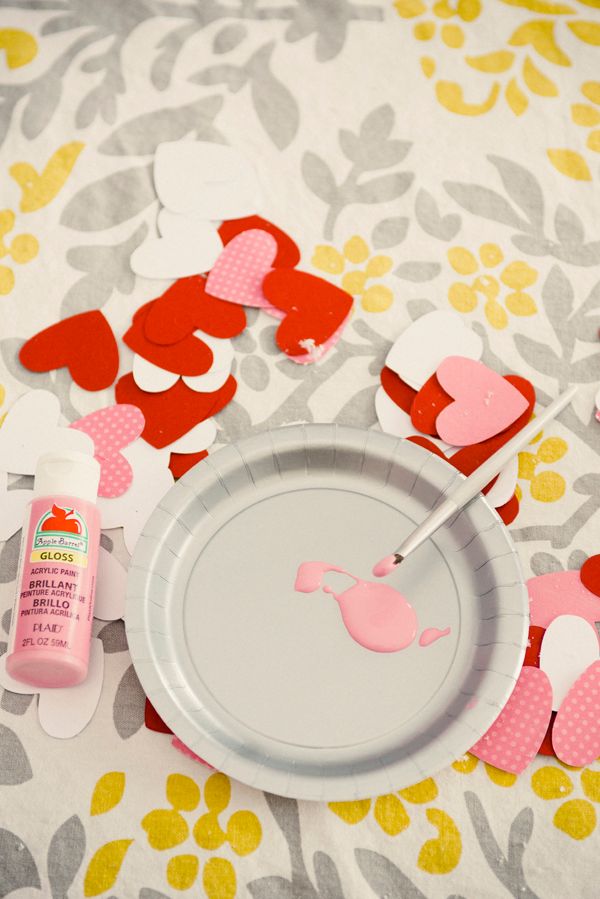
Simply brush the paint on the top...
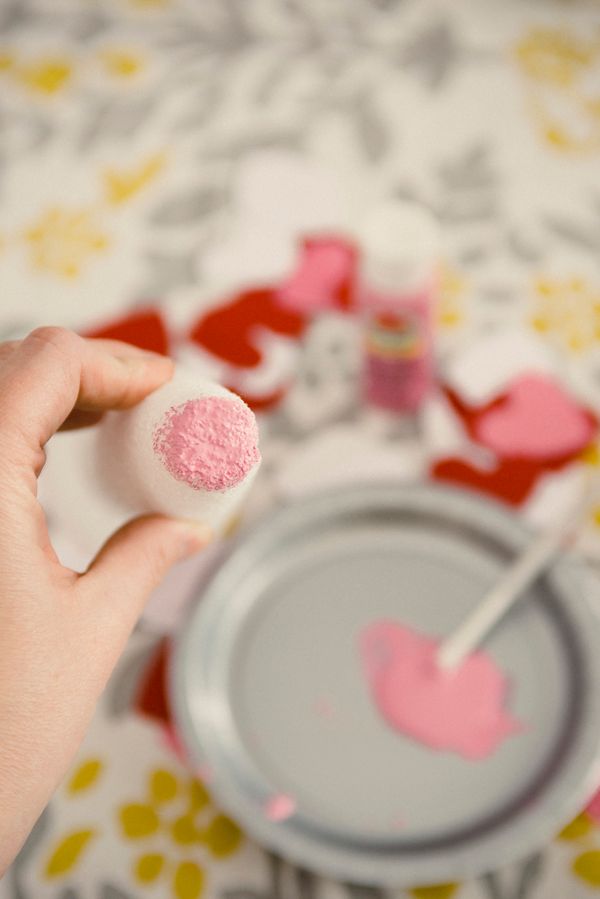
...and swirl the bottom of the cone around the plate full of paint. BOOM!
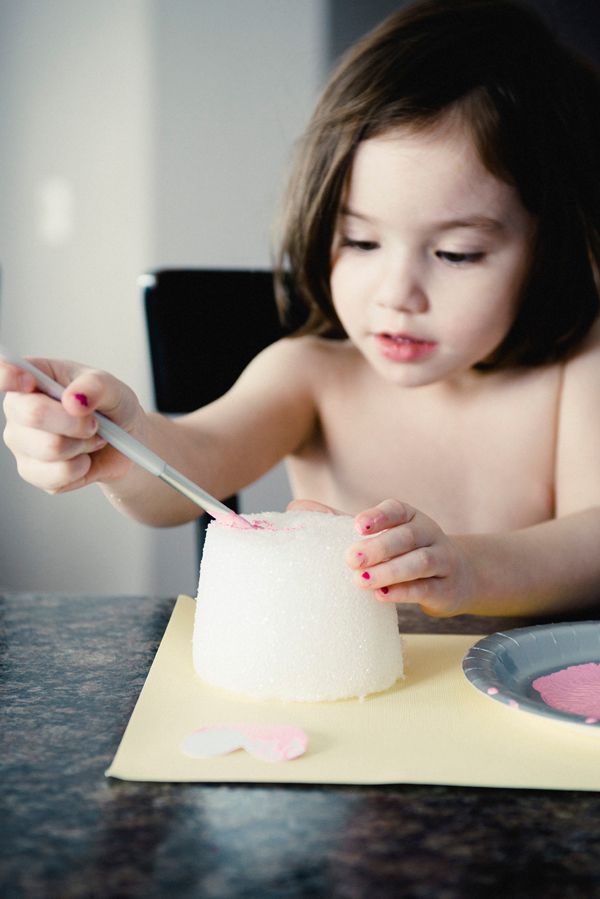
Give DeeDee the bottom of the cone you cut off and let her paint and think that she is helping. She was so quiet for so long.
Then the fun part, sticking the beautiful pearl pins into the hearts and cone.
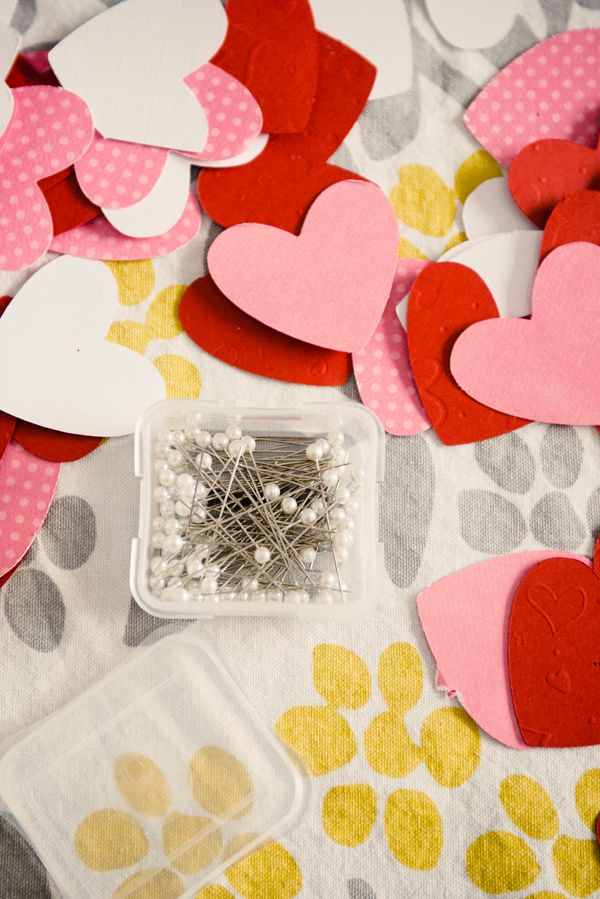
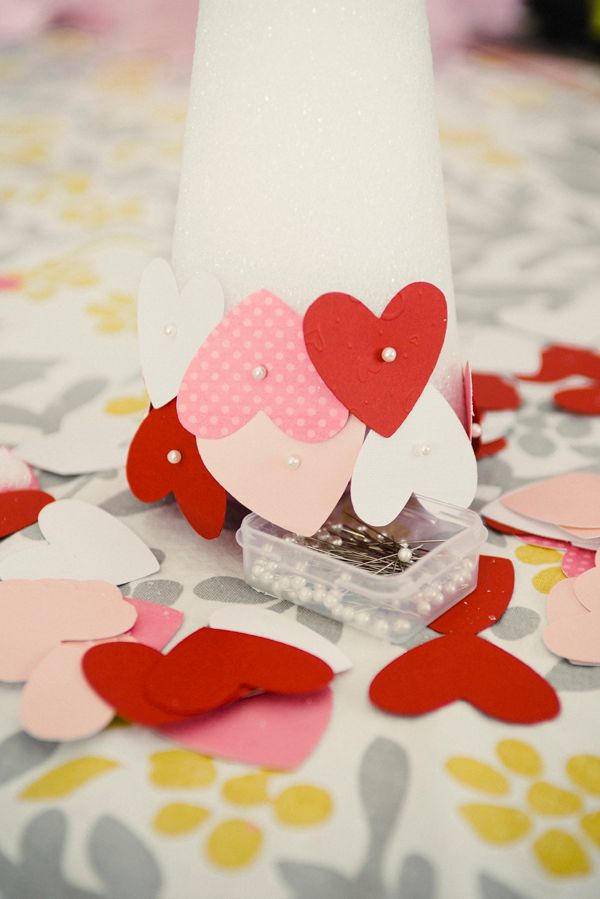
I did the first row pretty straight to make a scalloped edge overlapping the bottom of the cone, and then I got all sorts of random. This is where I would have variegated the size of hearts and gone from big to small as I went up the cone. Just like when you decorate a real Christmas tree. Meh. You live and learn.
Continue all the way up the tree. (Sticking pins in things is a really great stress reliever.)
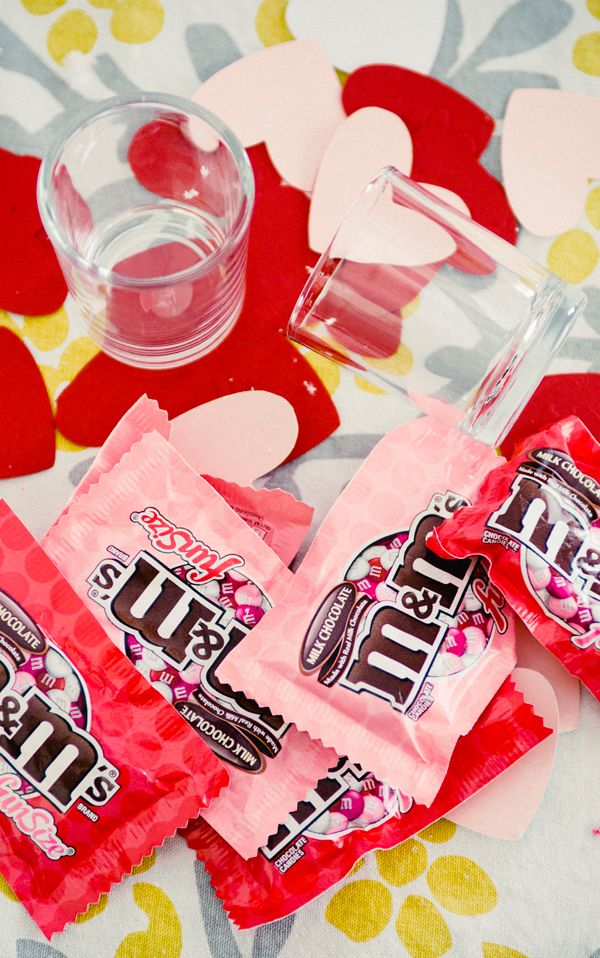
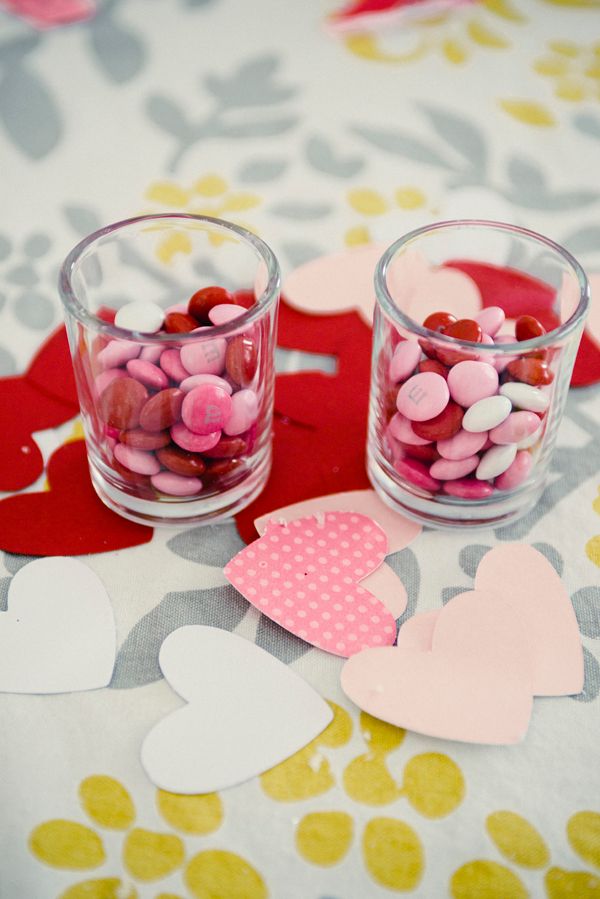
Then it was time to add the candy. We chose the M&M's Valentine assortment because the colors matched our hearts so perfectly.
Then we stuck the cone tree lids on top. That is when I decided I needed different sized hearts and possibly that I should have painted the entire cone because you can totally see through the hearts in the following photos. From far away though? No big deal.
See? So stinking adorable and my kids thought I was super mom. Total time? 1.5 hours from gathering the materials to taking this photo, and I got to spend quality time with Camilla as she poked pins into Styrofoam with me. Bonus? They totally fit perfectly onto my ever so tiny 'mantel'.

Happy Valentine's Day.
xoxo
4 comments:
So cute my sweet friend! Happy Valentine's Day!
These are adorable. And, i Love your bird.
I love these trees! Next year we're going to slap some up on our mantel. Maybe your boyfriend Carl can help?
Love Love Love!!! great job
Post a Comment